Step 1. Check your black nbn® connection box
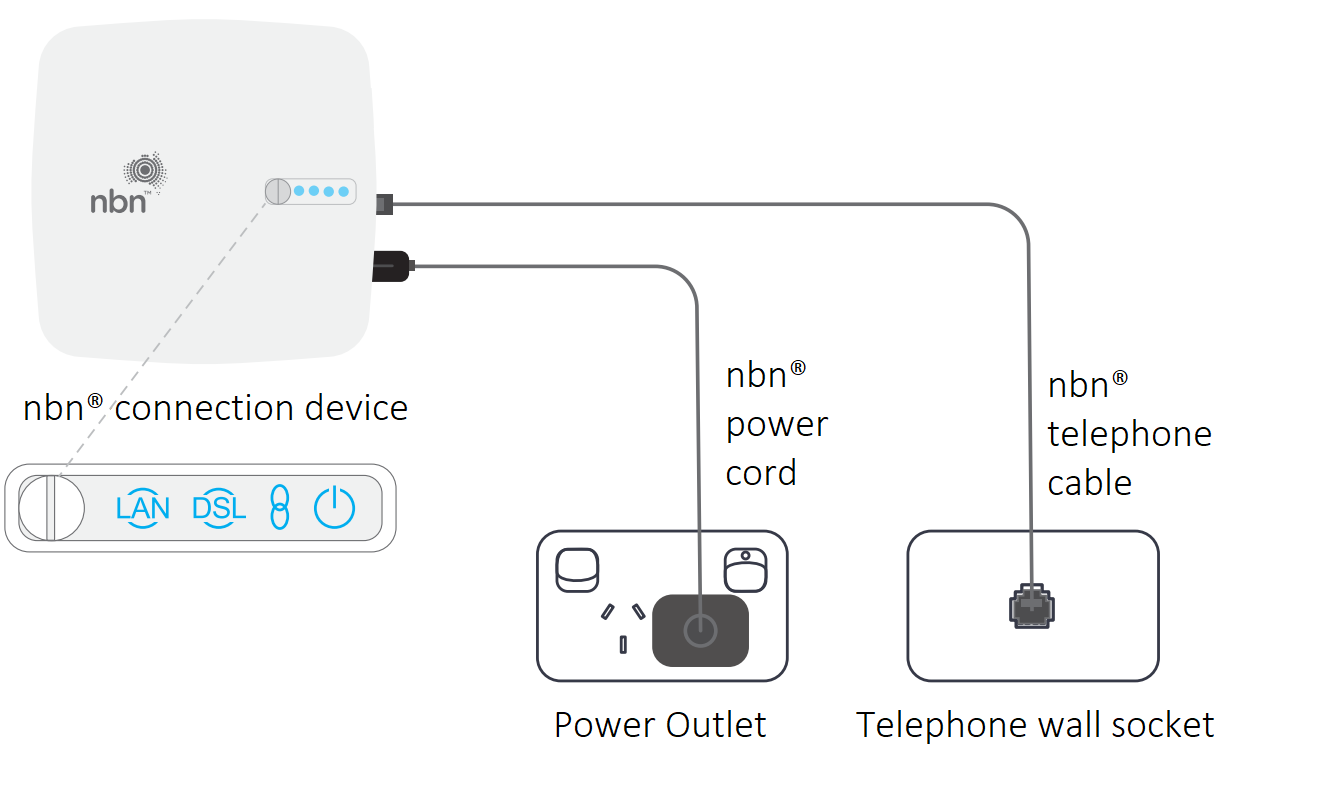
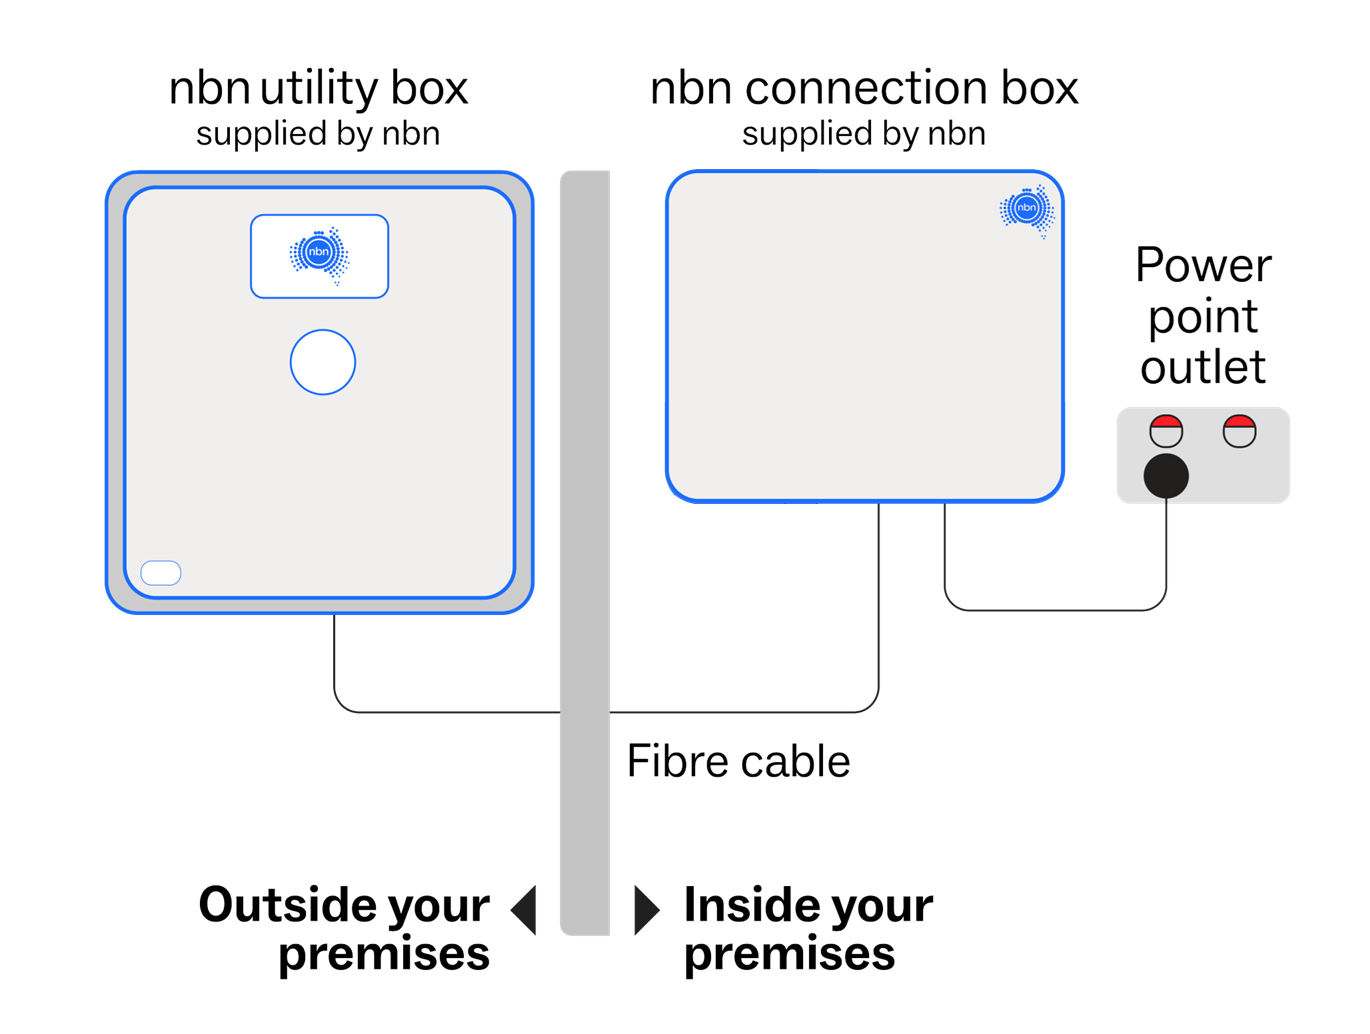
You should already have a black nbn connection box (pictured below) at your premises.
Make sure it’s connected to the power and your coaxial wall outlet. If it’s not connected, follow the instructions below.

Connecting your black nbn box
- Plug the power supply into a Power Outlet.
- Connect the power supply to the black nbn box.
- Connect the Coaxial Cable from the port on your wall to the black nbn box.
- If you have Pay TV through your cable connection, you will need to use the supplied splitter from your brown box and follow the shaded area in the diagram above to plug in the cables.
If your nbn box is missing or damaged, please chat with our technical support team here and we'll arrange a replacement.
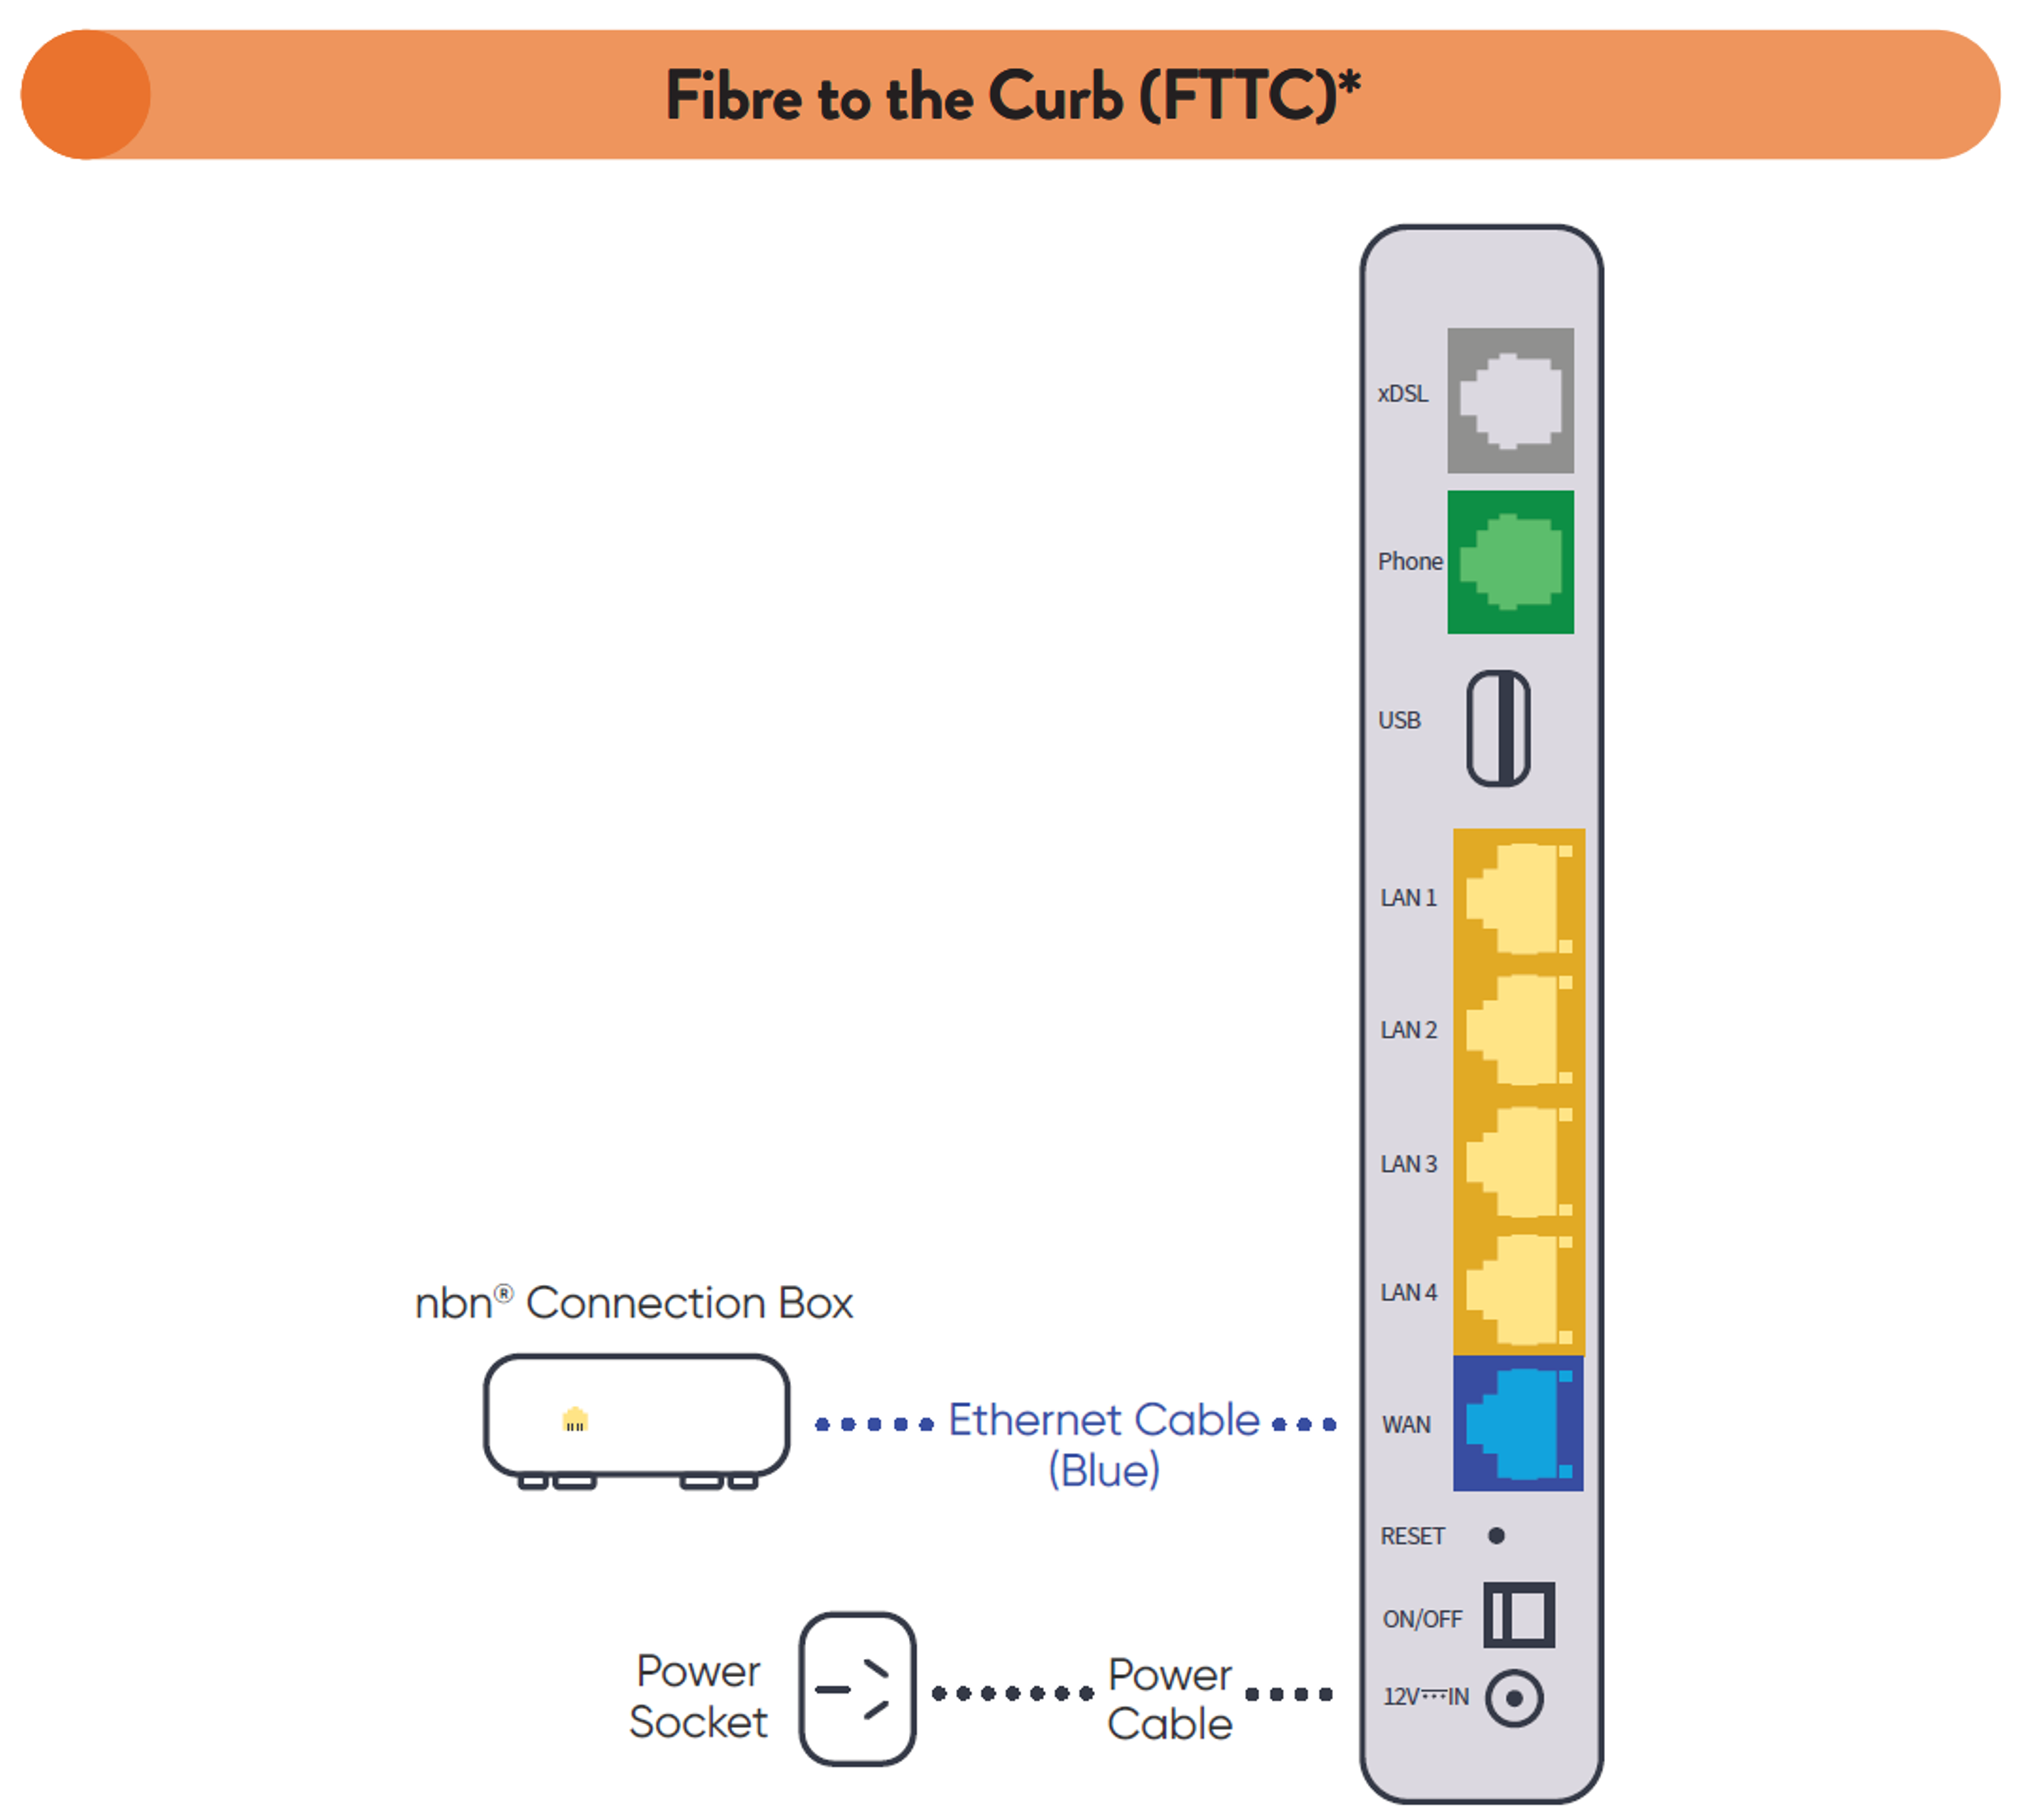
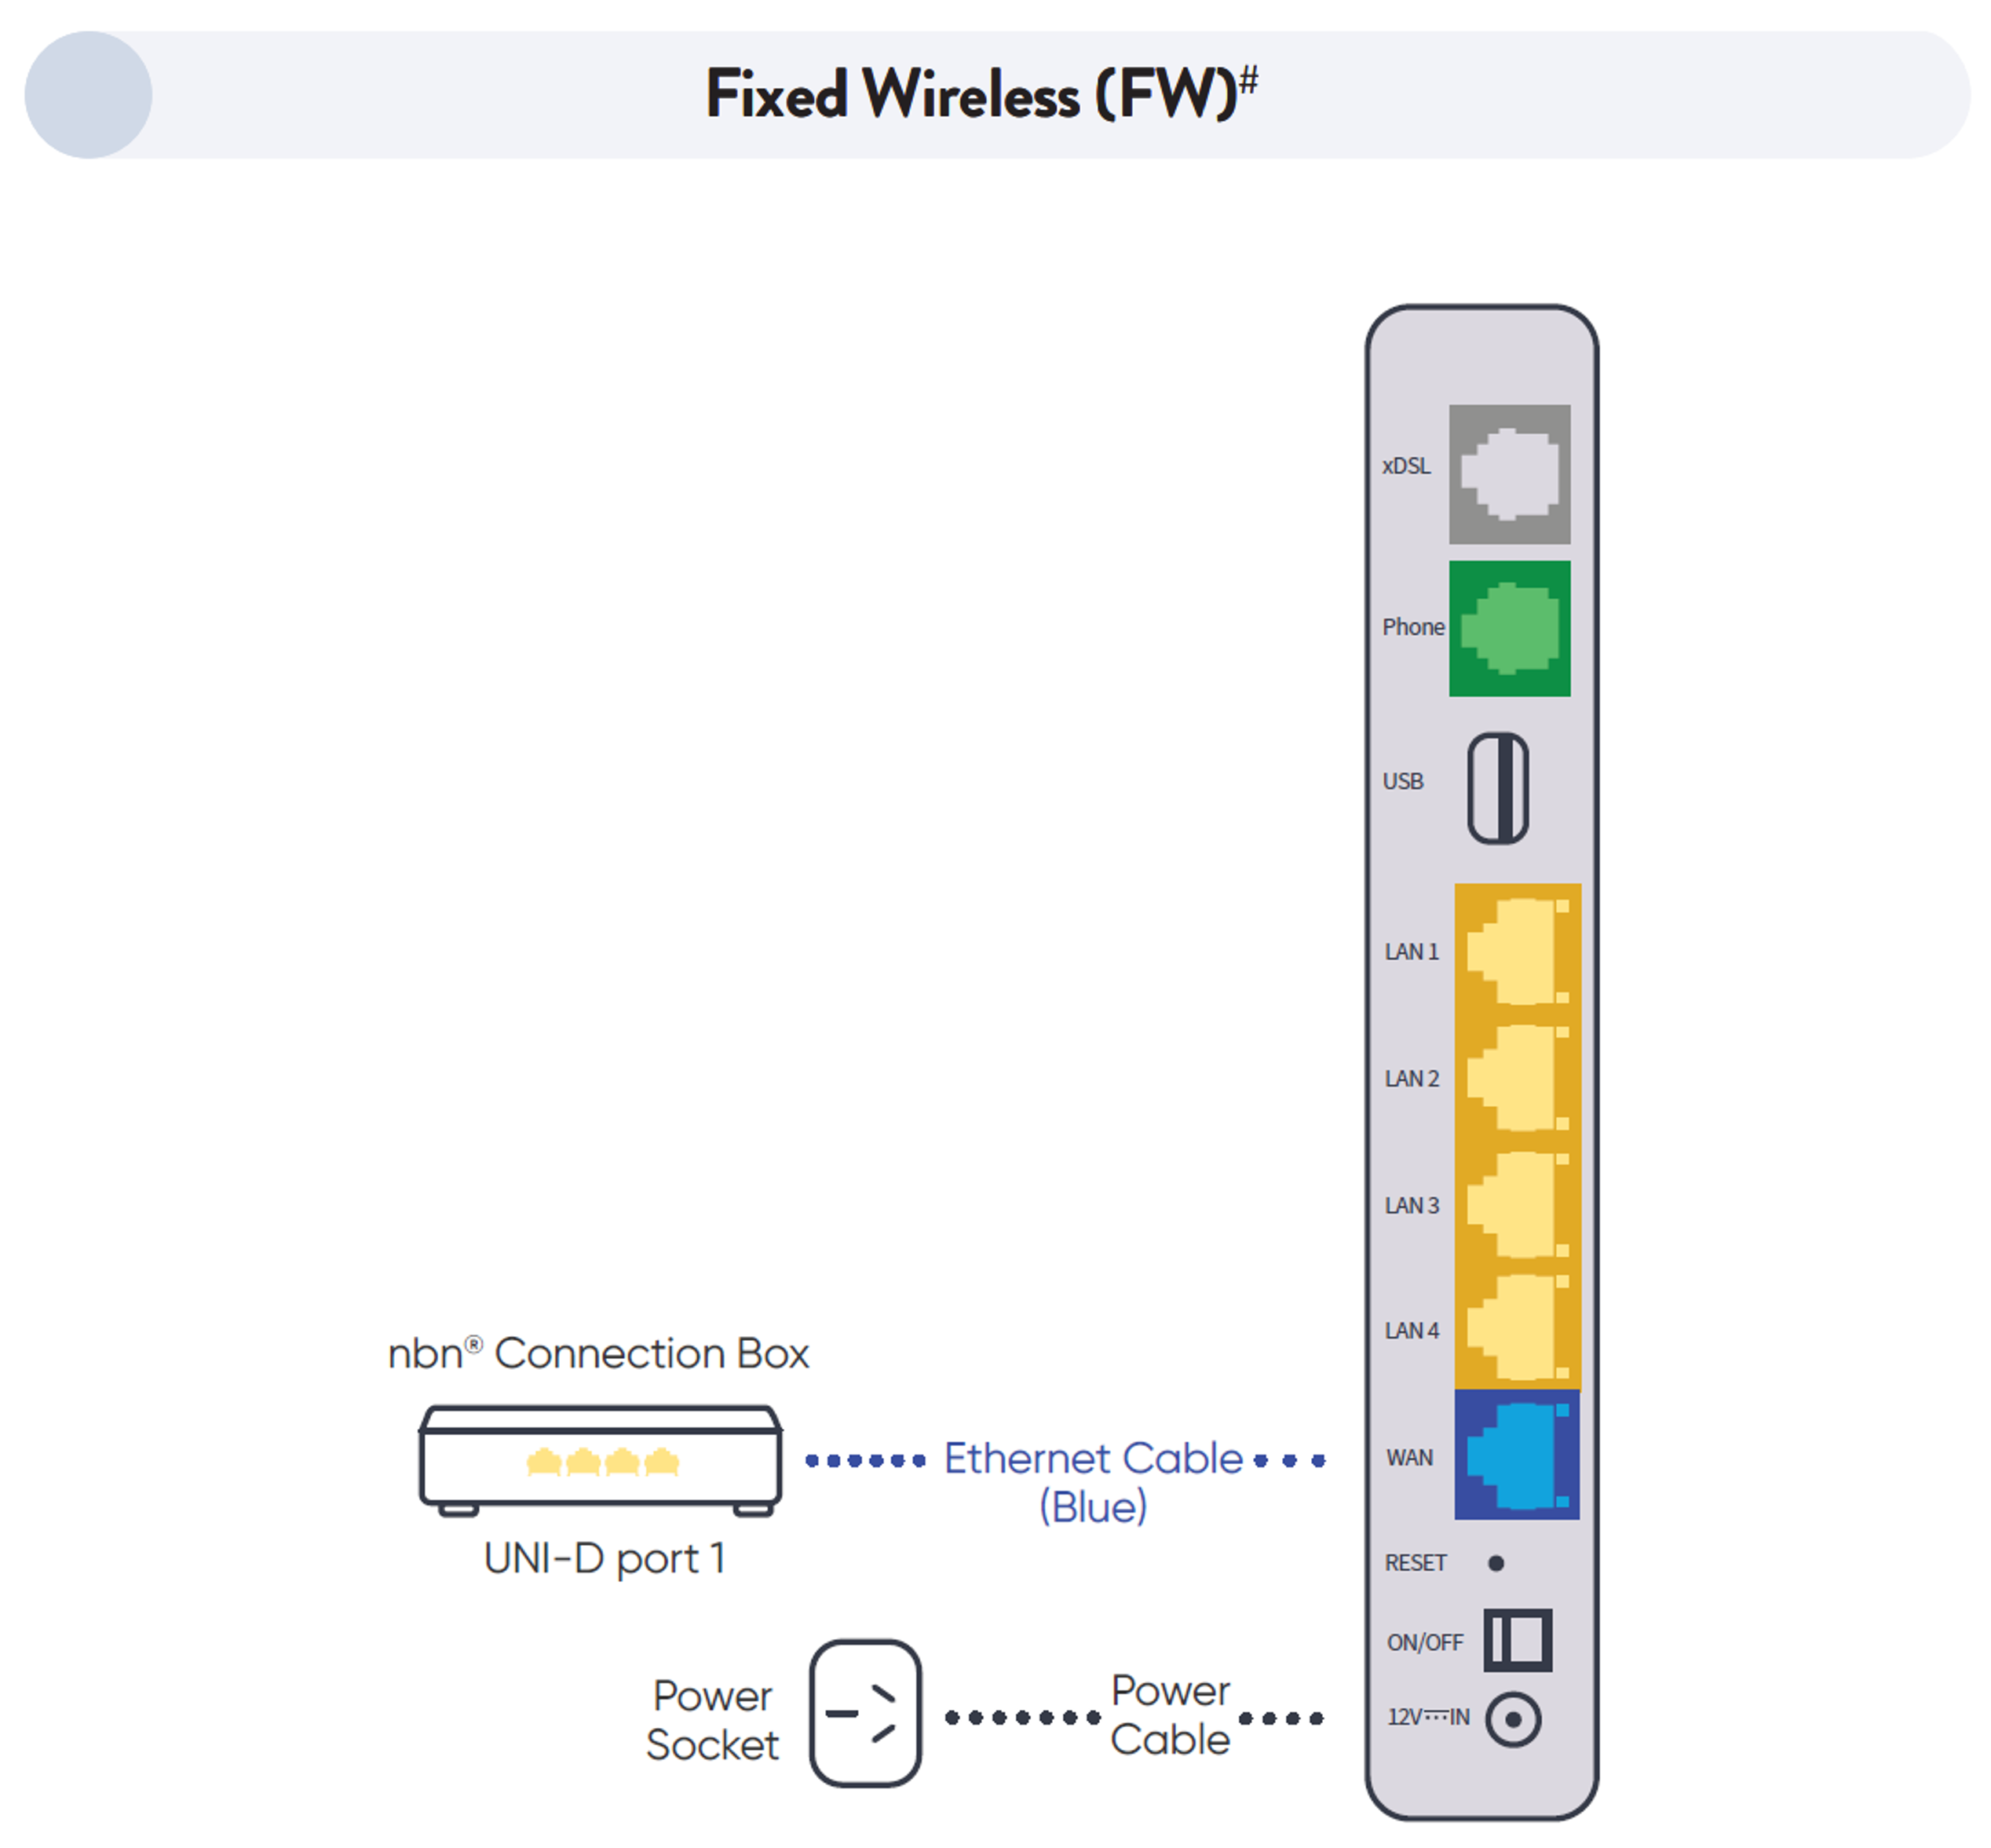
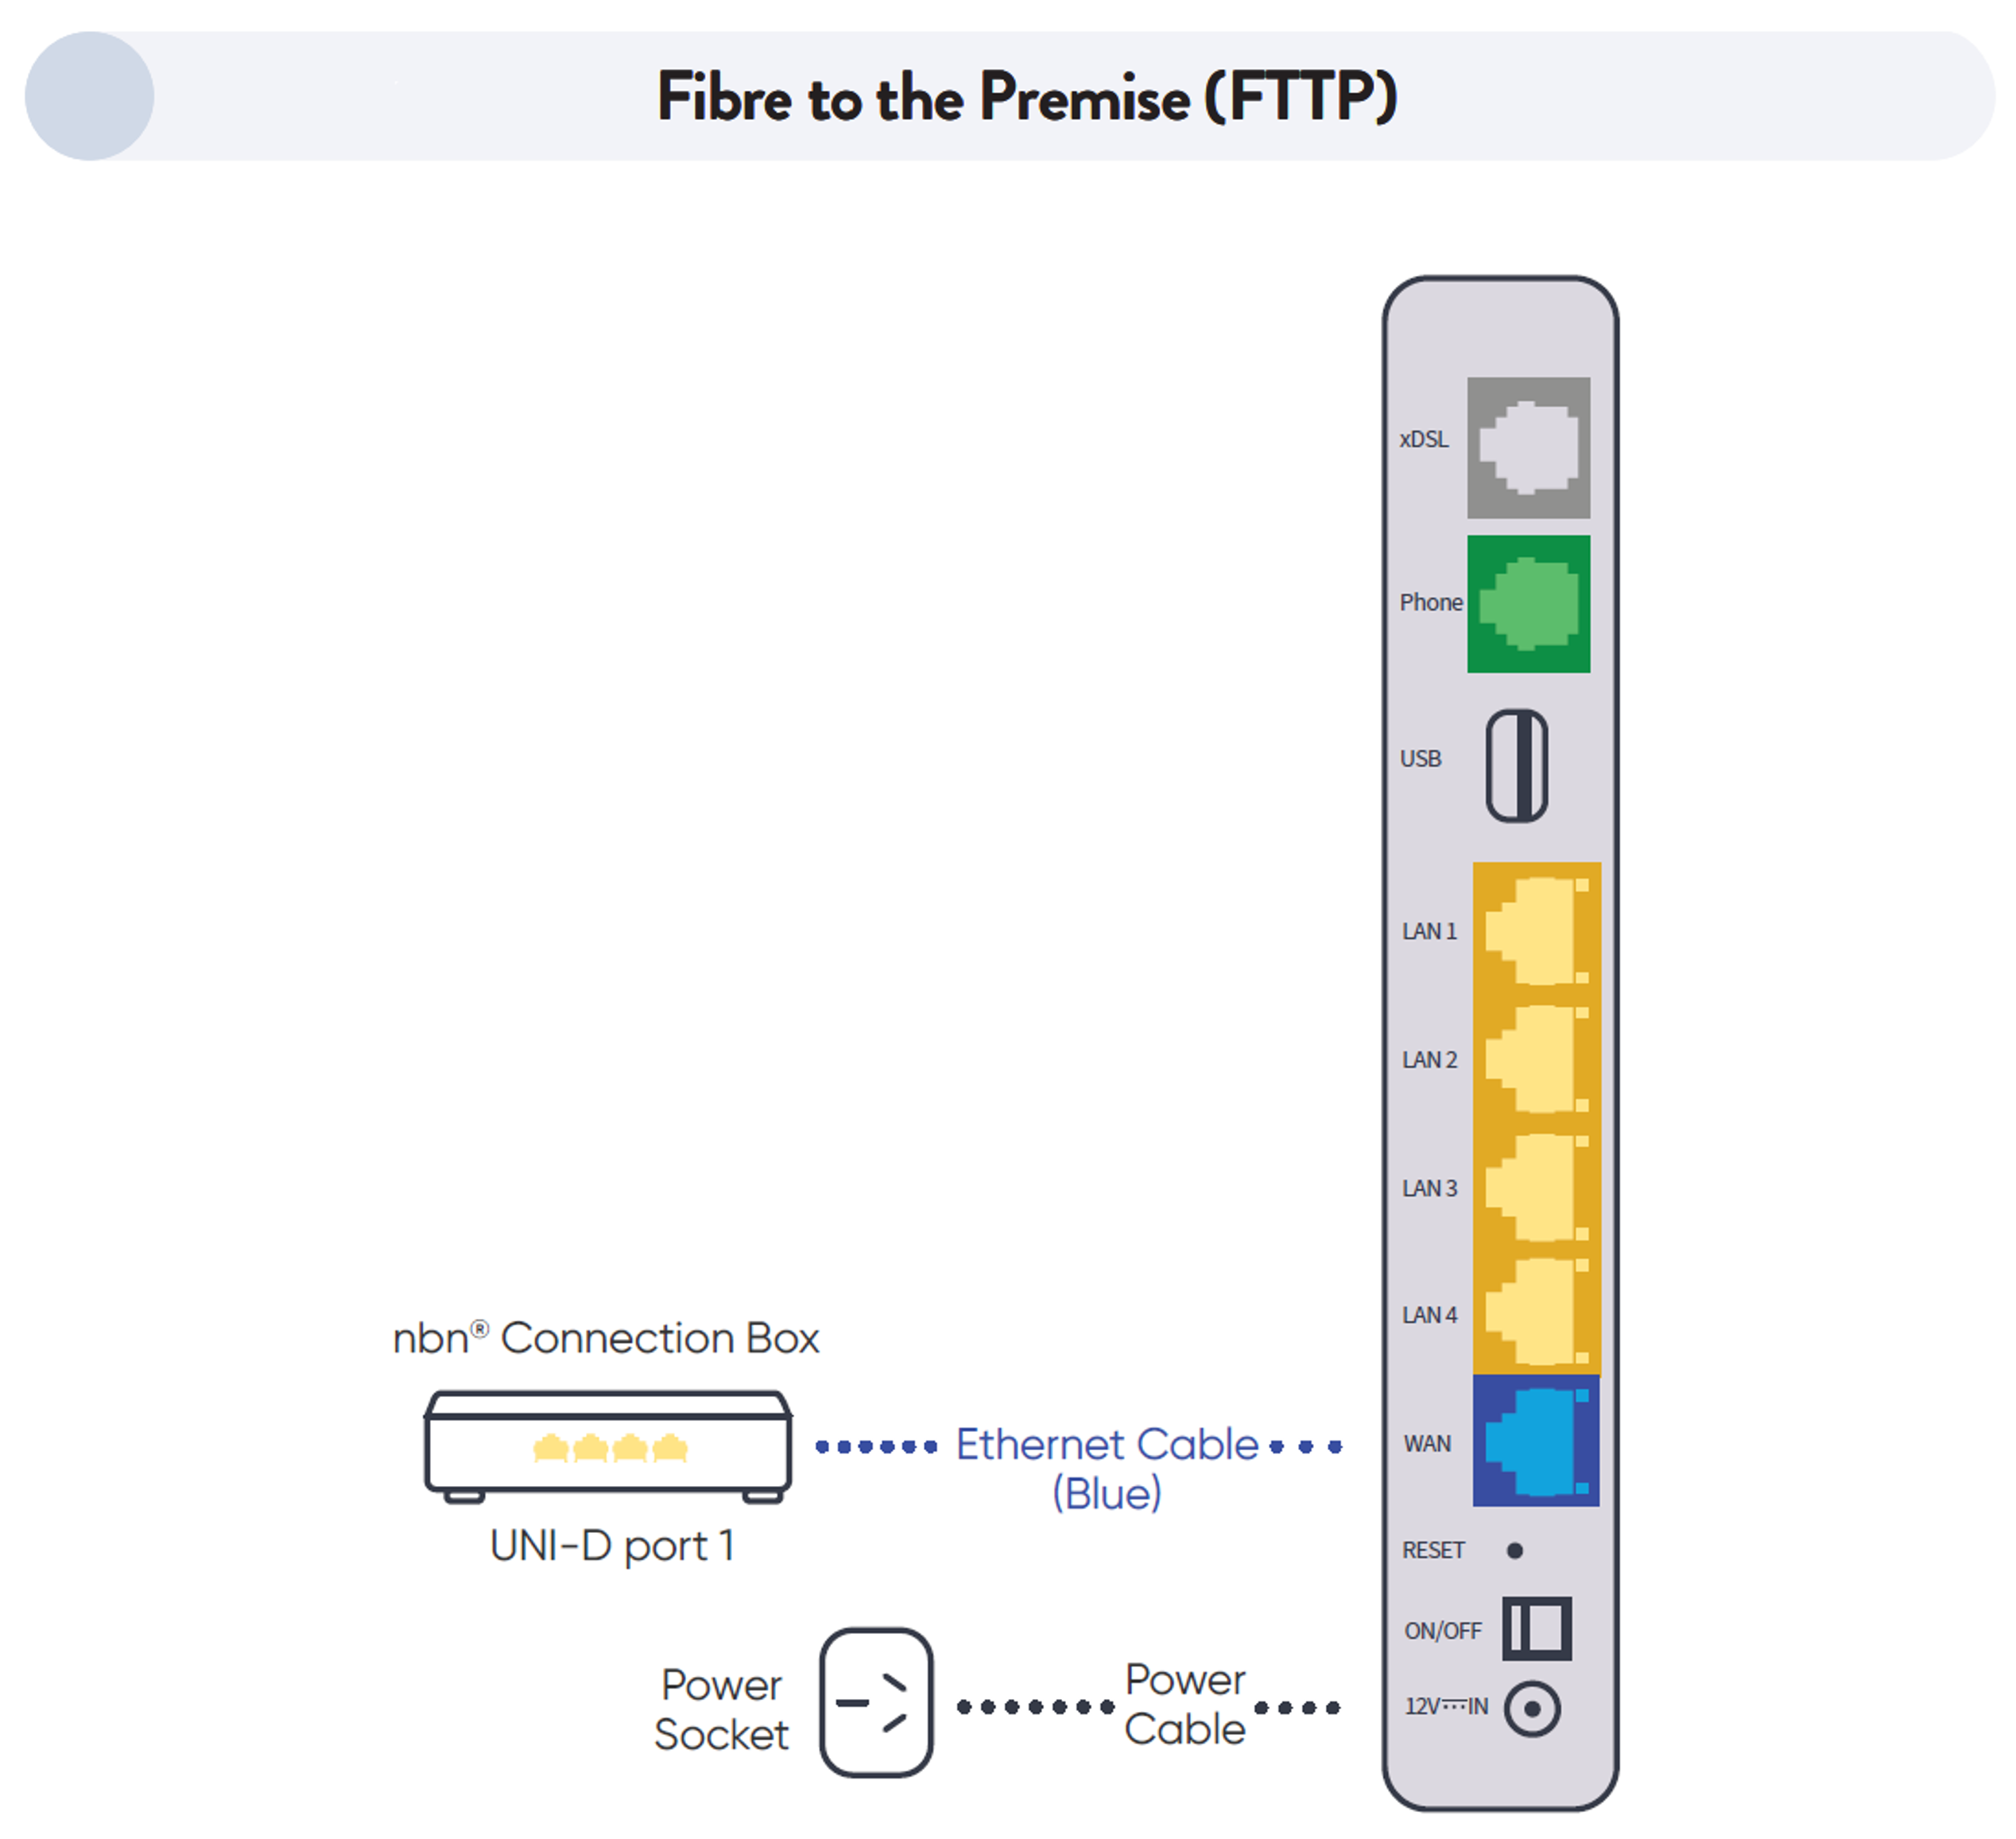
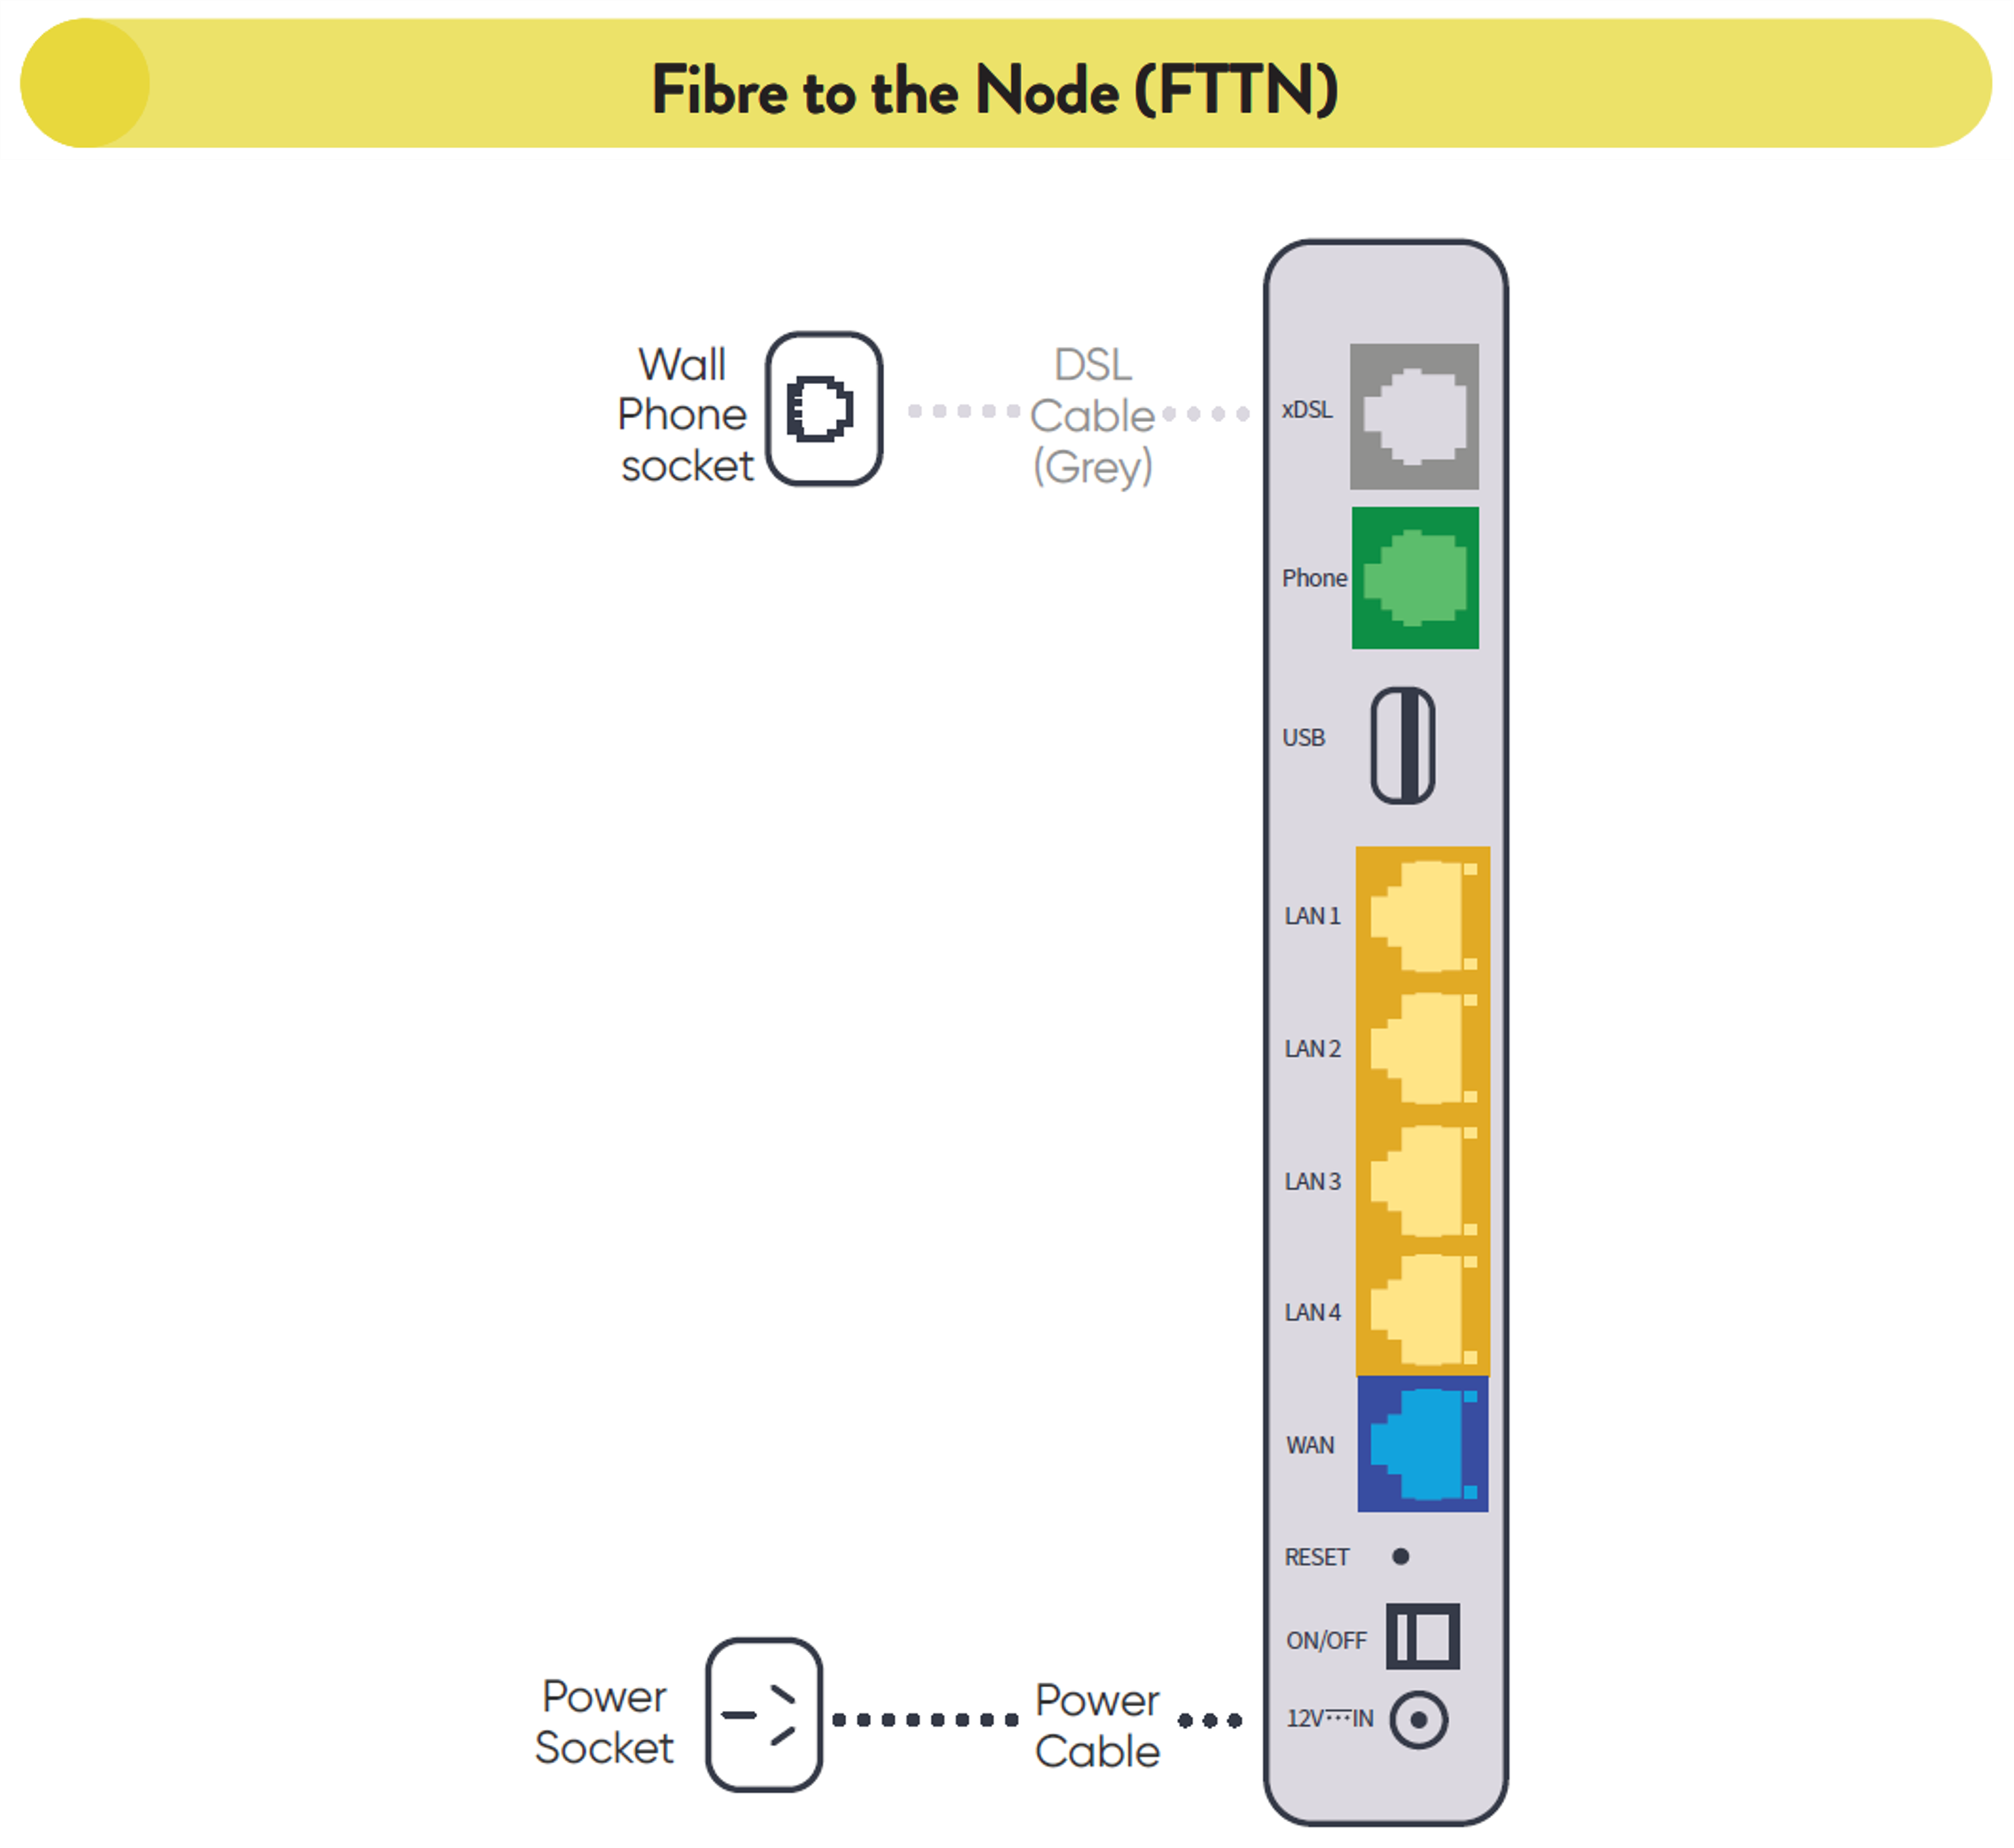
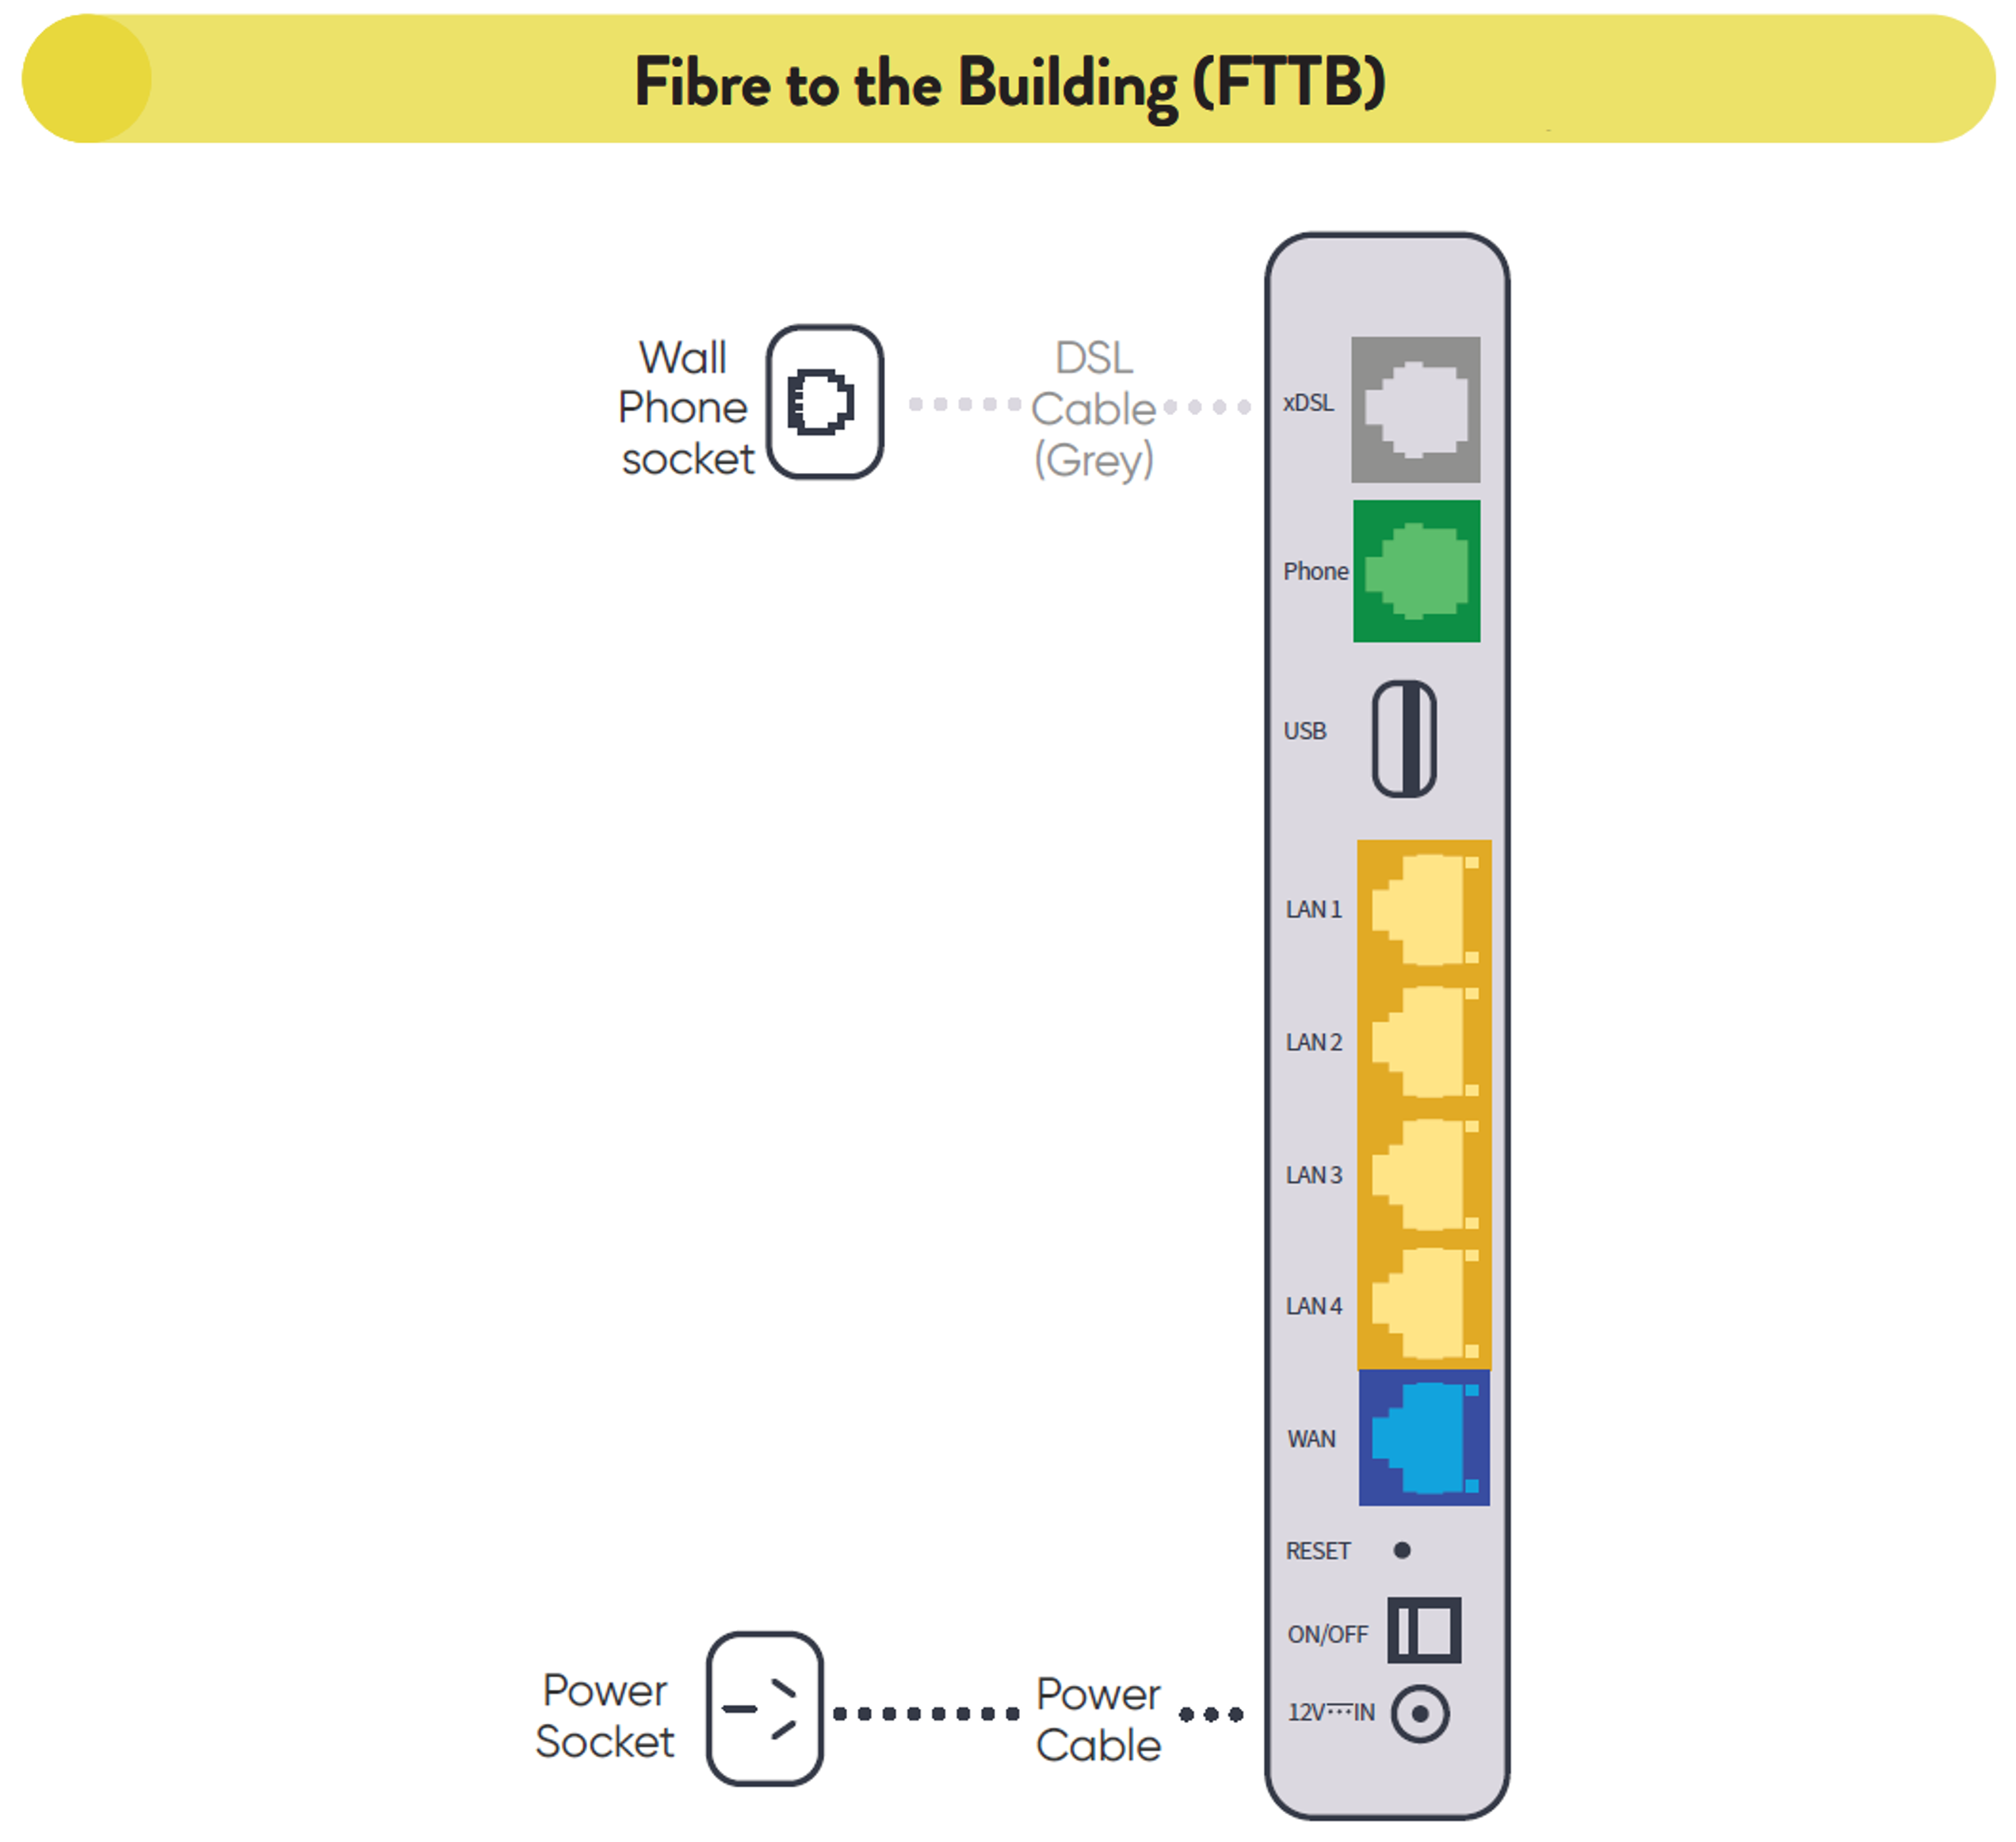
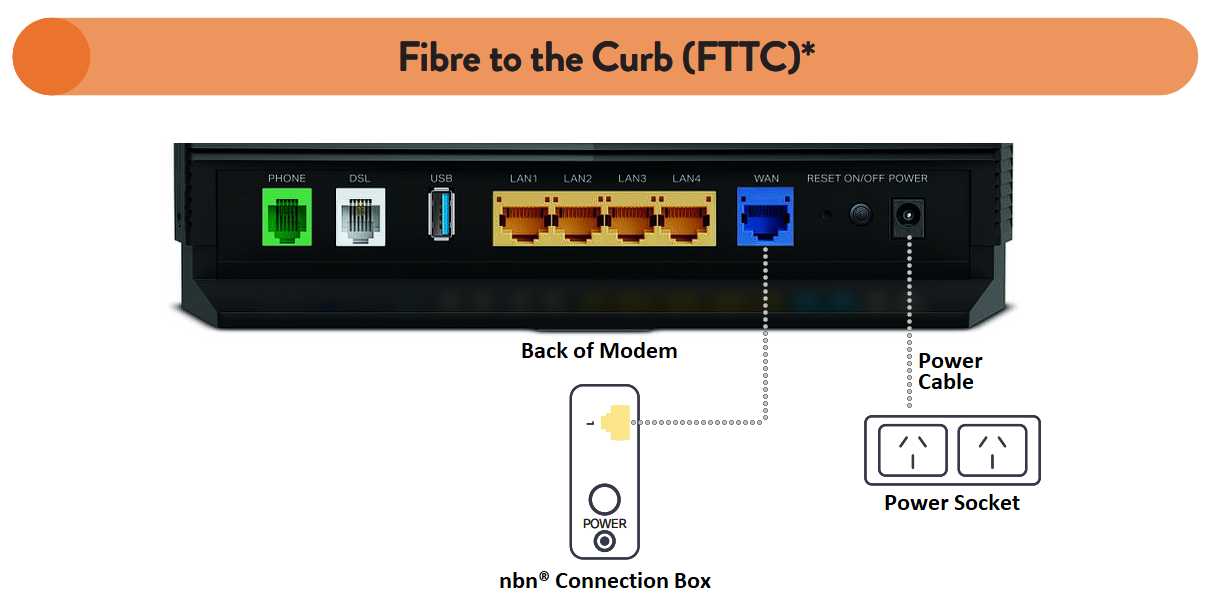
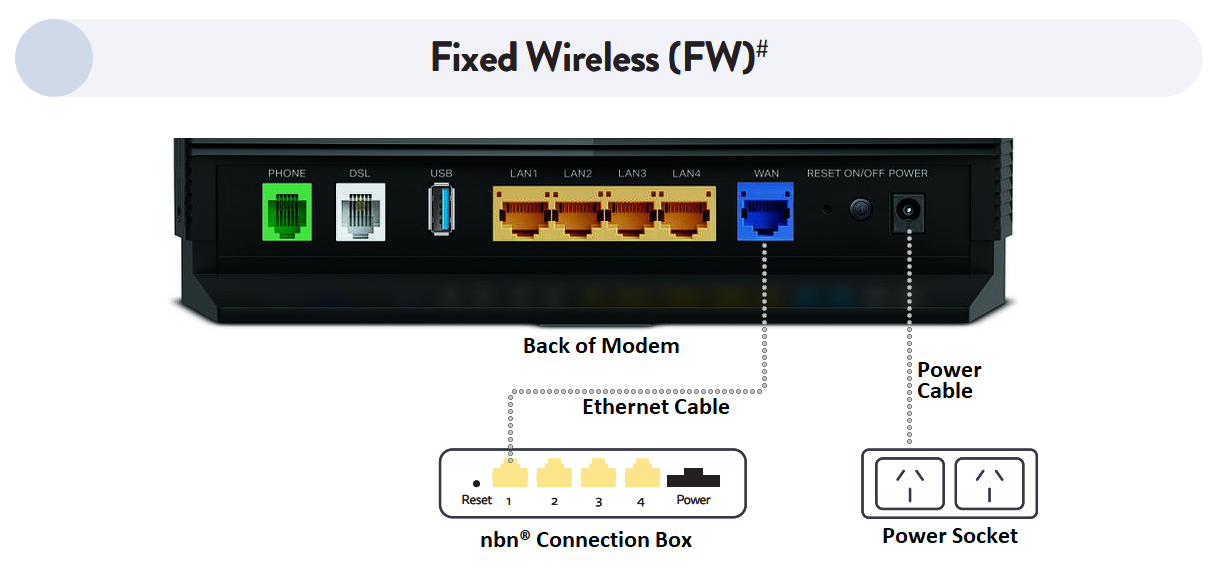
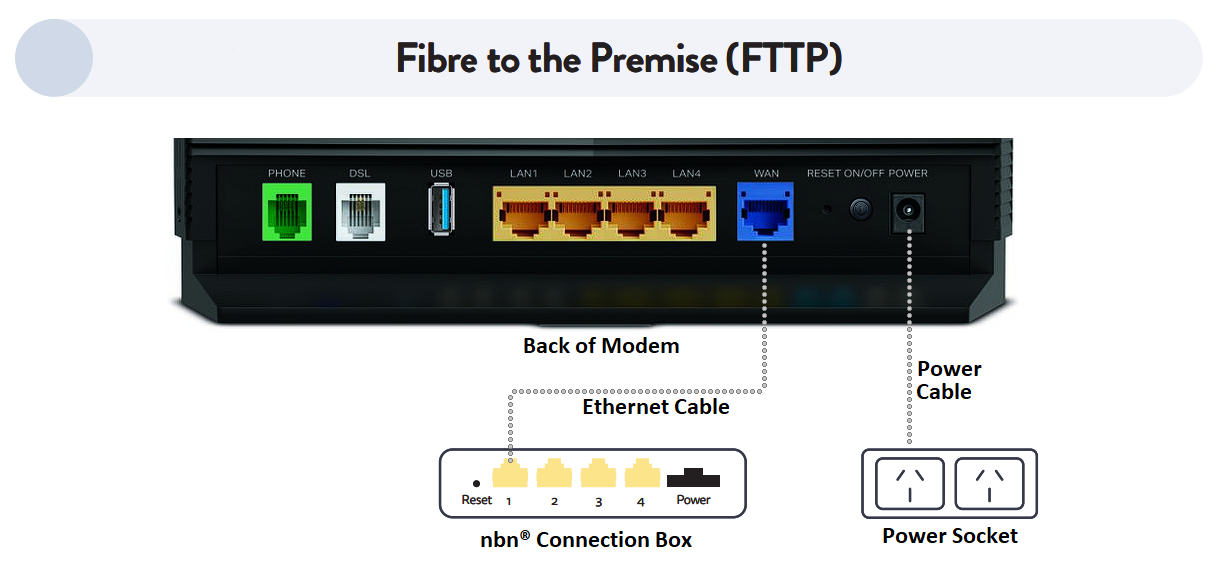
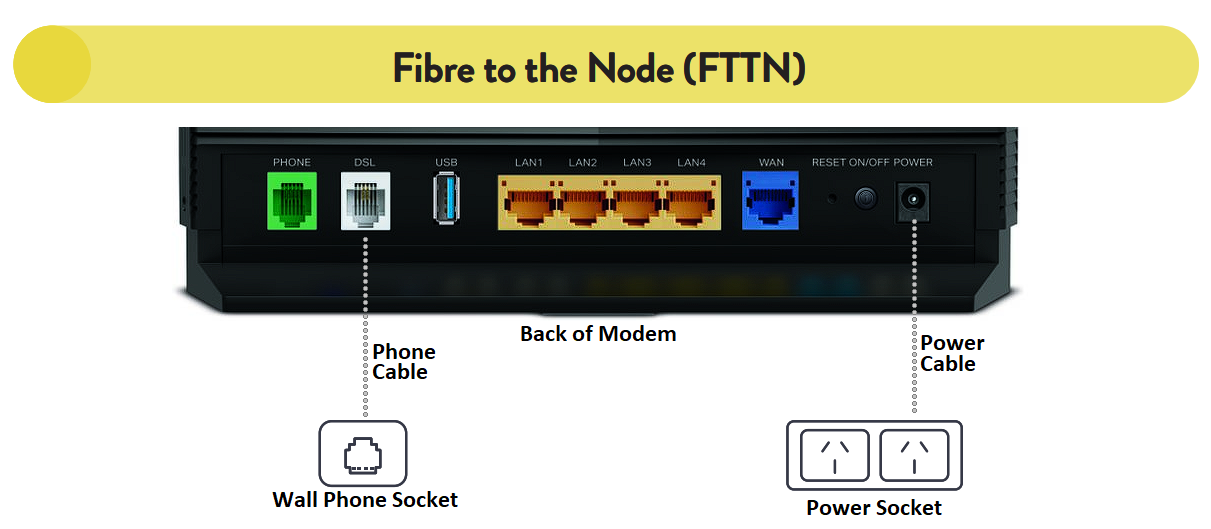
Step 2. Connect the modem
Follow the instructions below to connect your new Dodo Koan DG2144 modem to the nbn connection box.
Use the blue ethernet cable provided with your modem to connect the WAN port on your modem to the UNI-D1 port on the nbn connection box. You must use the UNI-D1 port otherwise your service won’t work.

- Turn on your modem and wait for the modem lights to turn on.
Step 3. Wait for the green lights
These lights should be illuminated on the front of the modem. This can take several minutes. Once the internet light is on your service is connected.
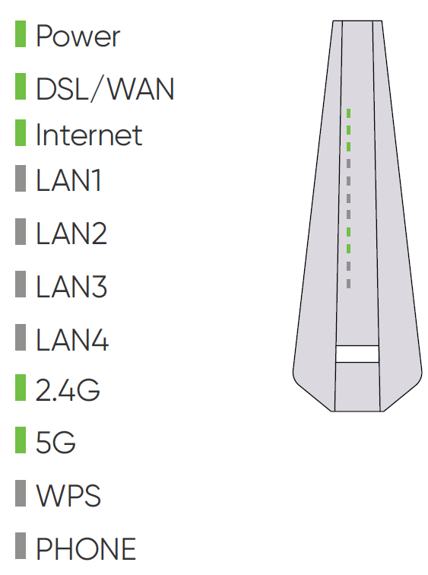
If after 10 minutes these lights aren’t illuminated, get in touch with us for support.
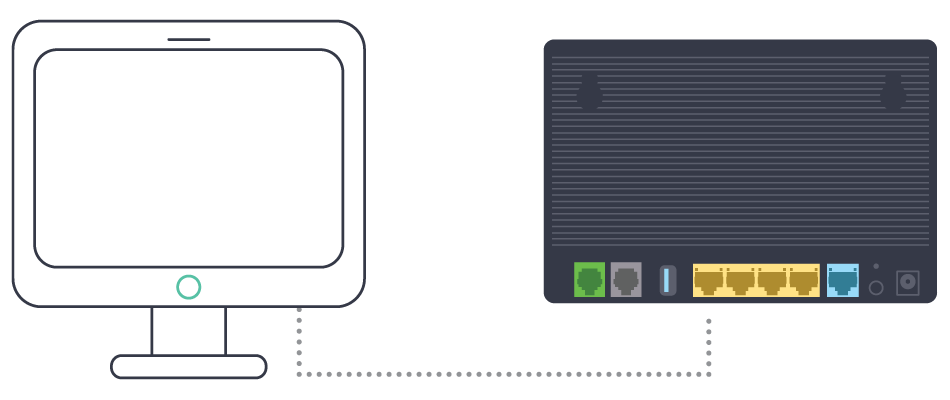
Step 4. Connect your device
Connect wirelessly (Wi-Fi)
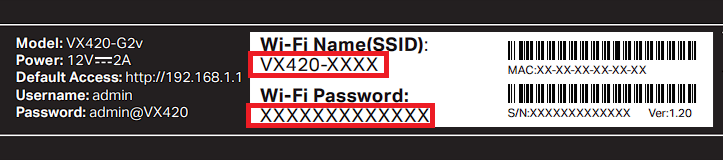
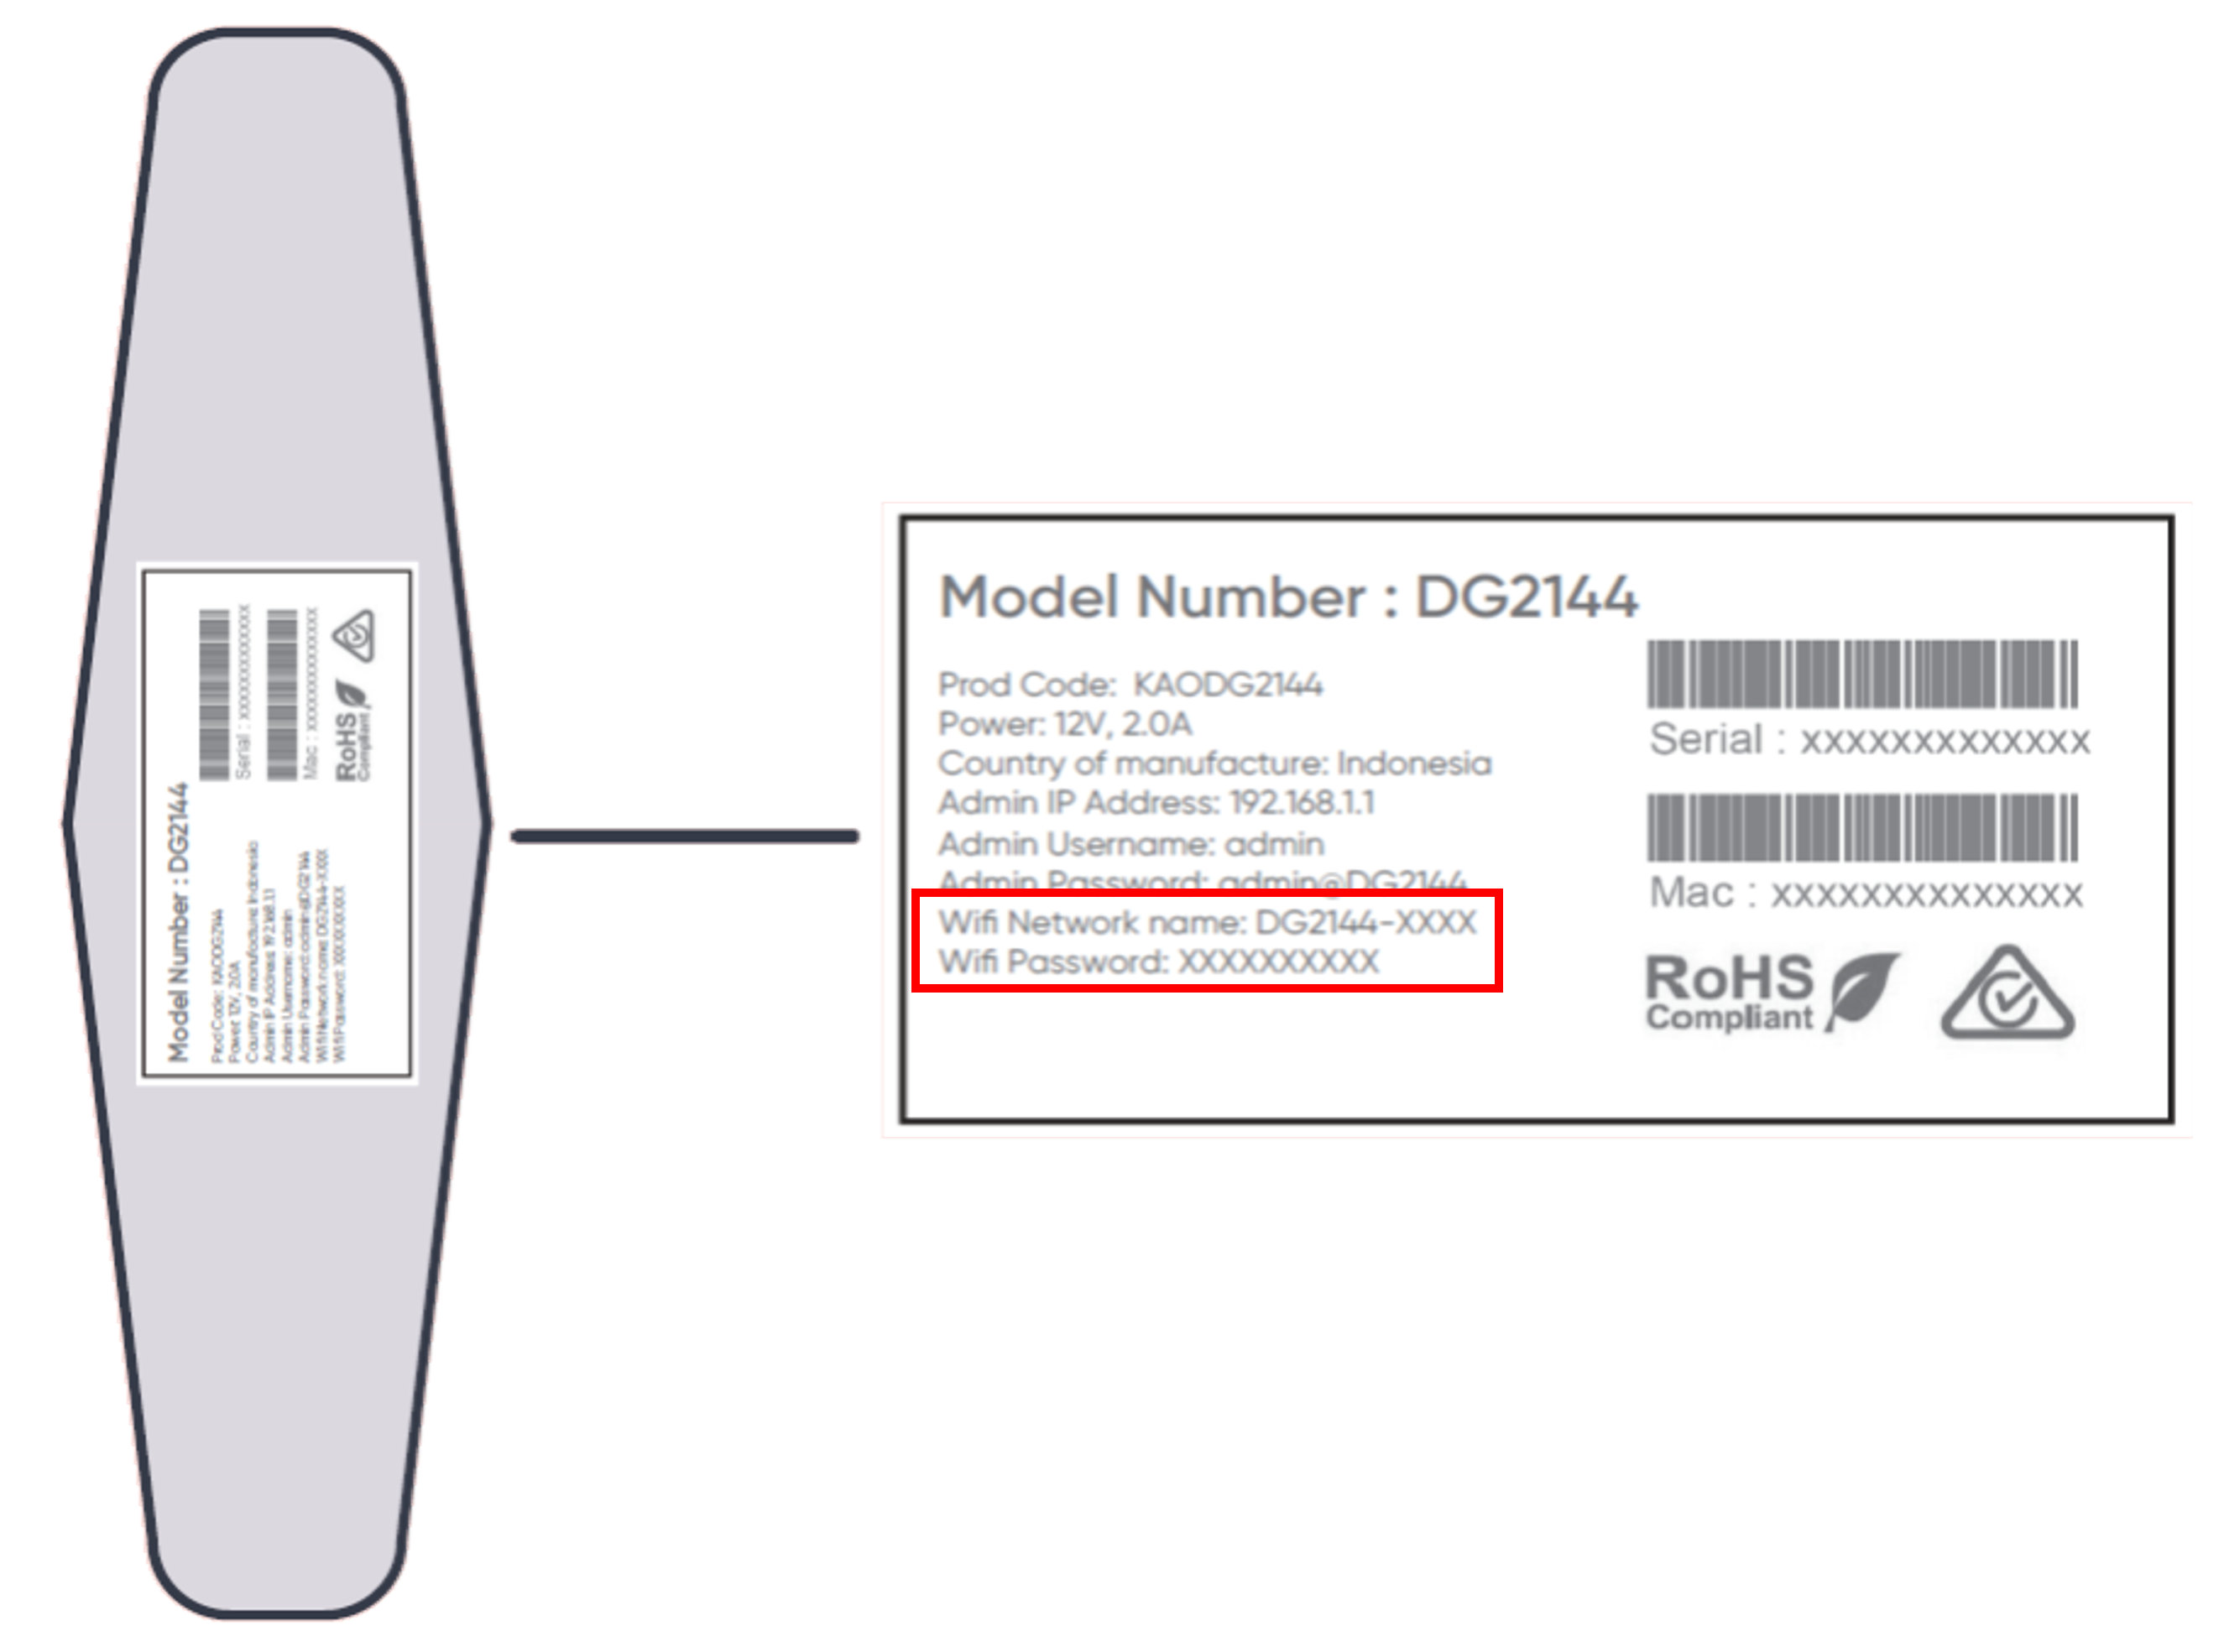
Find the Wi-Fi Name and Wi-Fi Password printed on the sticker on the base of the modem.
To connect, choose the Wi-Fi Name on your device, then type in the Wi-Fi Password when prompted.
The password is case sensitive.
Connect with a cable
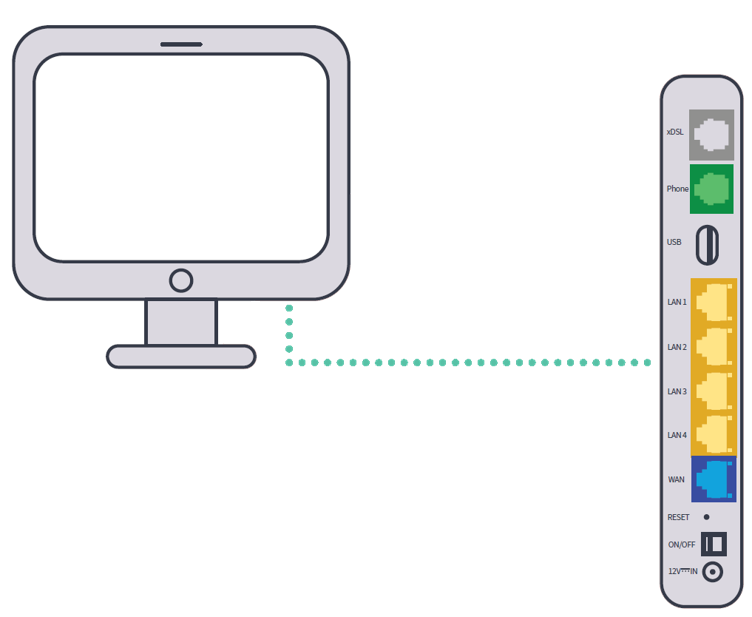
To connect a device, like a laptop or desktop computer, directly to the modem, plug one end of an ethernet (yellow) cable into a yellow LAN port on the back of the modem and the other end into your device.
If you are still having issues connecting to the internet you can chat with our technical support team here or you can view our troubleshooting guides found here.
Download/View