HX510 Mesh Wi‑Fi Booster Setup Guide
This guide outlines the supported pairing methods for the HX510 Mesh Wi-Fi Booster. Please follow the method that best suits your installation scenario.
- Method 1 – Pairing by Ethernet cable (Recommended for simplicity)
- Method 2 – Pairing by Aginet APP
Overview
Enhance your Wi‑Fi coverage and overall connectivity by installing the HX510 Mesh Wi‑Fi Booster within your premises. The setup process is straightforward and can usually be completed within a few minutes.
What's Included in the Box
- 1× HX510 Mesh Wi‑Fi Booster
- 1× Ethernet cable
- 1× Power adapter
Method 1 – Pairing by Ethernet Cable
Confirm the modem is online
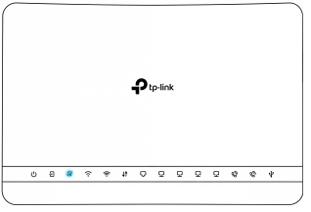
Ensure that the Internet connection on your main modem is active. Verify that the Internet LED on the VX420-G2v or VX220-G2v modem is solid or flashing.

VX420-G2v
VX220-G2v
Power on the HX510
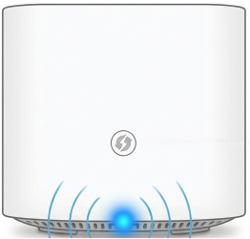
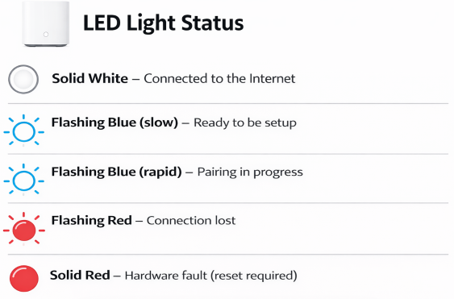
Place the HX510 Wi‑Fi Booster next to the modem, connect it to power, and switch it on. Wait until the LED indicator starts flashing blue slowly, this can take a few minutes.
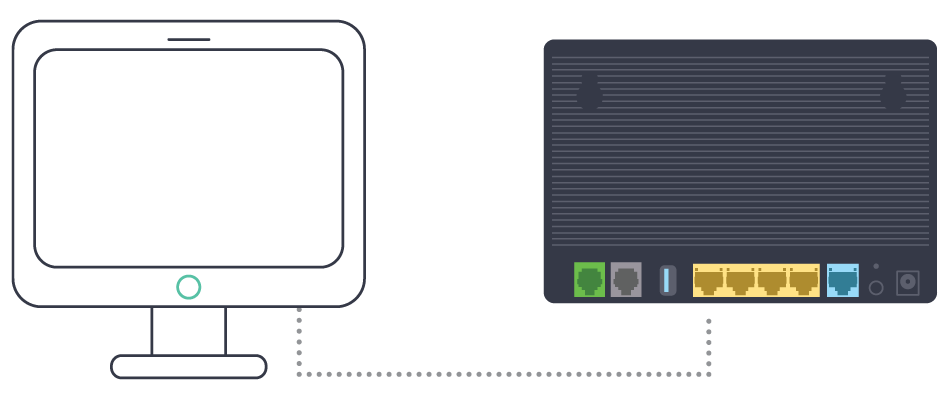
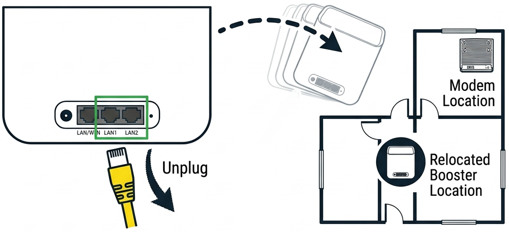
Connect the Ethernet cable
Plug the supplied yellow RJ45 Ethernet cable into an available yellow LAN port on the back of the VX420‑G2v or VX220-G2v modem. Connect the other end to a LAN port of the HX510 Wi‑Fi Booster.
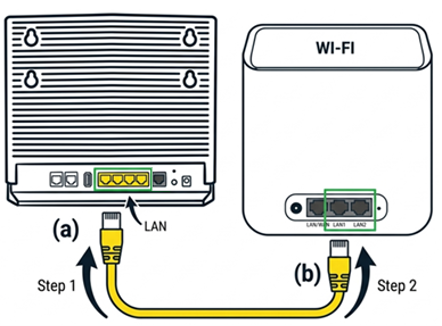
VX420-G2v mesh pairing with HX510 by using Ethernet cable
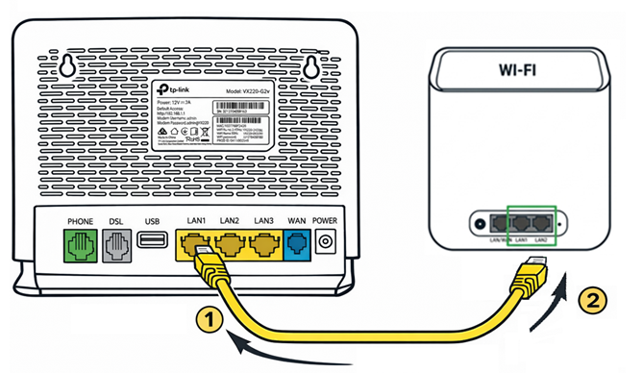
VX220-G2v mesh pairing with HX510 by using Ethernet cable
Wait for pairing to complete
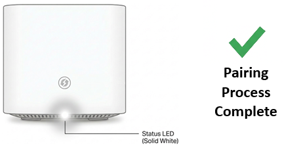
Once pairing begins, the LED on the HX510 will flash blue rapidly. Wait until the LED turns solid white. This process may take up to 5 minutes.
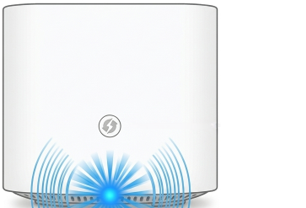
Pairing in progress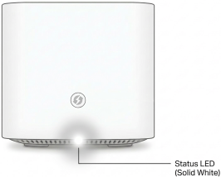
Pairing completed
Relocate the Wi‑Fi Booster
After pairing is complete, unplug the Ethernet cable and move the HX510 to a suitable location within your premises.
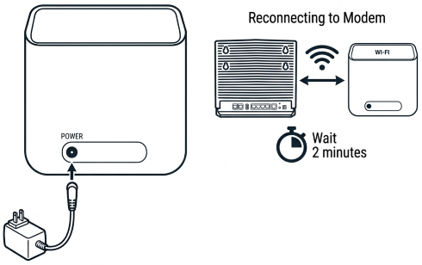
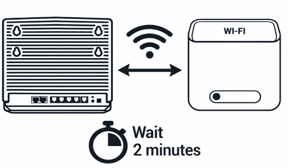
Power on again in the final location
Power on the HX510 in the desired location and allow approximately 2 minutes for it to reconnect to the VX420‑G2v modem. When the LED becomes solid white, setup is complete.
Finish setup
Once completed, the LED will become solid white. The pairing process is now finished.
Method 2 – Pairing by Aginet APP
Confirm the modem is online
Ensure that the Internet connection on your main modem is active. Verify that the Internet LED on the VX420-G2v or VX220-G2v modem is solid or flashing.
VX420-G2v

VX220-G2v
Connect your mobile device to the modem Wi‑Fi
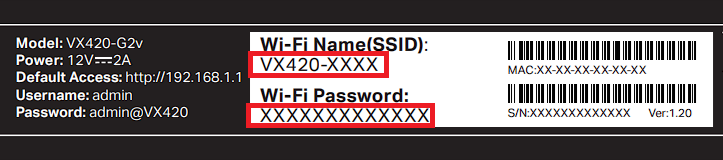
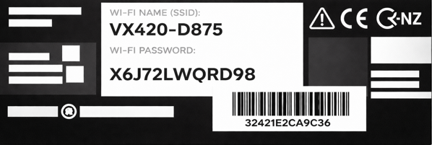
Connect your mobile device to the Wi-Fi network of the VX420-G2v or VX220-G2v modem. The Wi-Fi SSID and password can be found on the product label. For the VX420-G2v, the label is located on the bottom of the device. For the VX220-G2v, the label is located on the back of the device.
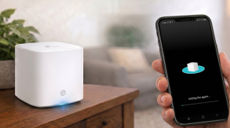
Open the Aginet APP
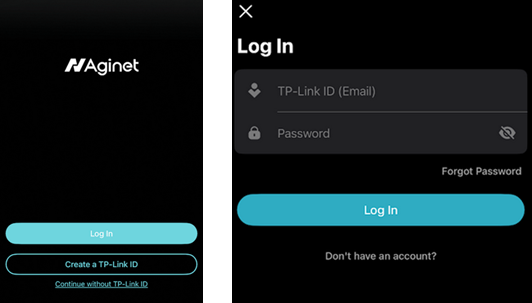
Launch the Aginet APP on your mobile device.

Install the APP if needed
If the Aginet APP is not installed, download it from the appropriate APP store for Android or iOS.

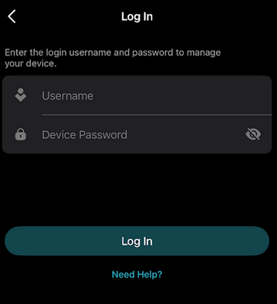
Sign in to TP-link account
Sign in to your TP-Link account. If you do not have an account yet, please select the option “Create a TP-Link ID” to create one first.
Login to your modem and add the HX510 to your network
You need to log in to your modem. Check the modem username and password on the label, then enter them in the app.
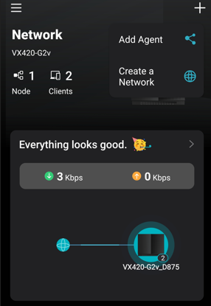
Adding the HX510 to your network
After logging in to the modem, Tap the “+” icon in the top-right corner, and select “Add Agent” to begin pairing the HX510 Wi‑Fi Booster.
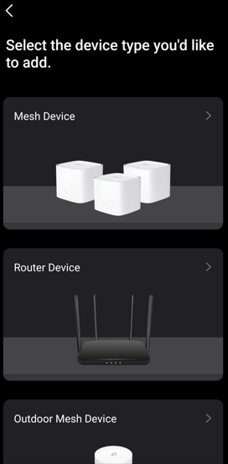
Select Mesh Device
Follow the in‑APP instructions and select “Mesh Device”.
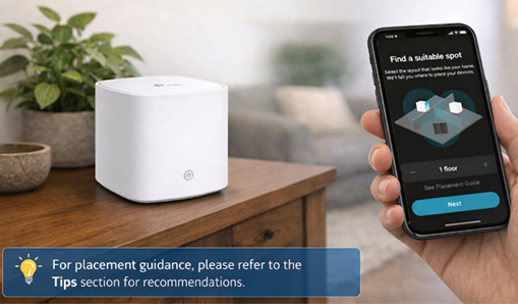
Choose a suitable location
Place the HX510 in a suitable location within your premises and tap “Next” in the APP. For placement guidance, refer to the placement tips in this guide.
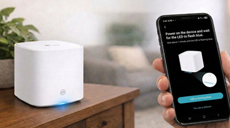
Power on the HX510 and wait for discovery
Power on the HX510. Wait until the LED indicator starts flashing blue slowly, then select “LED is flashing blue” in the APP.

HX510 ready to be set up
Confirm in the APP
If the HX510 is flashing blue but the APP is unable to discover it, move the HX510 closer to the modem router and try again.
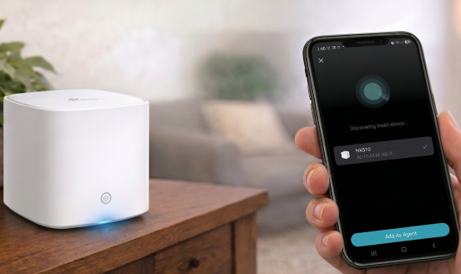
Add the HX510 to your network
Wait for the APP to discover the HX510 Mesh Booster. Once it is found, tap “Add as Agent” to add it to your network.
Wait for pairing to complete
Once the pairing process begins, the LED will flash blue rapidly. Please wait while the APP adds the HX510 Mesh Booster to your network. The pairing process may take up to 2 minutes to complete.
Pairing in progress
APP adding the agent
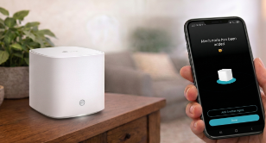
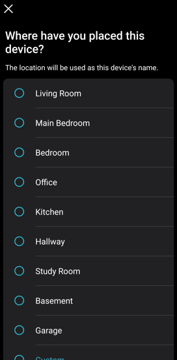
Name the booster
As the pairing process nears completion, the APP will prompt you to name the HX510. You can assign a name manually or select one based on its location so that it can be easily identified later during management.
Finish setup
Once completed, the LED will become solid white. The pairing process is now finished.
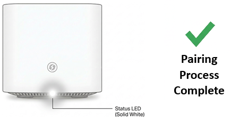
Solid white LED
HX510 has been successfully added by using APP
Tips: Placement Recommendations
- Place the booster in a central location for optimal coverage.
- Keep the booster elevated and avoid placing it behind metal or concrete structures.
- Position the booster within two rooms of the modem where possible.
- If you experience poor connectivity (e.g., red flashing LED), move the booster closer to the modem.
If you need setup help you can contact us here.