Look for the coloured sticker on your modem box to know which set-up guide fits your service.
Is the sticker on your box yellow? Great – let’s start!
1. Connect me
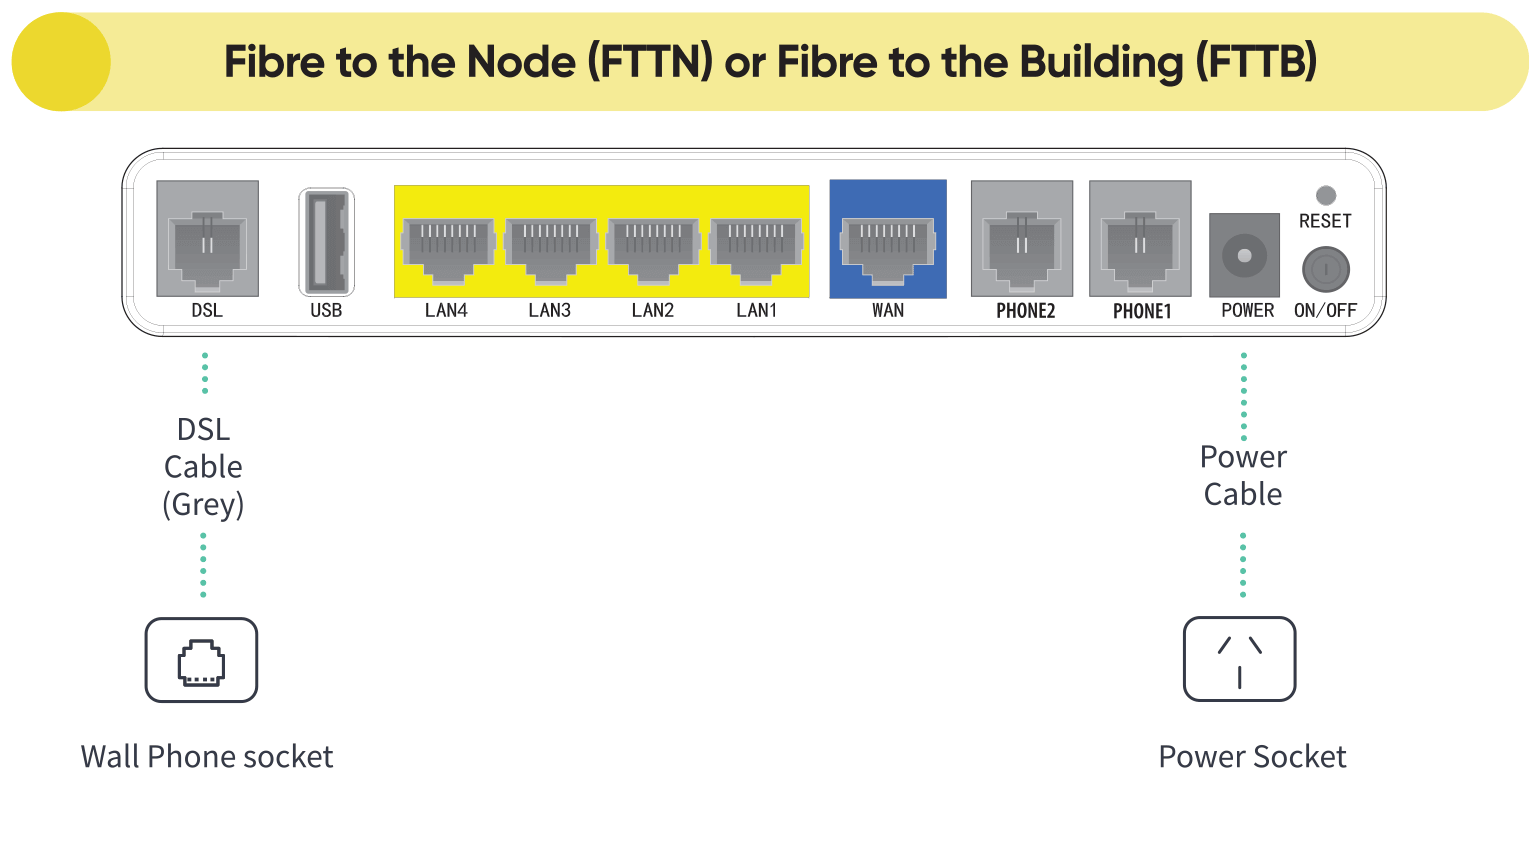
a. Look for the coloured sticker on the box. Plug in the cables as per the set up instructions that match your sticker.
b. Turn on your modem and wait for the modem lights to turn on.
c. Think about all the things you need to google while you wait.

2. Wait for the green lights
These lights should be illuminated on the front of the modem.

3. Connect your device
Connect wirelessly (Wi-Fi)
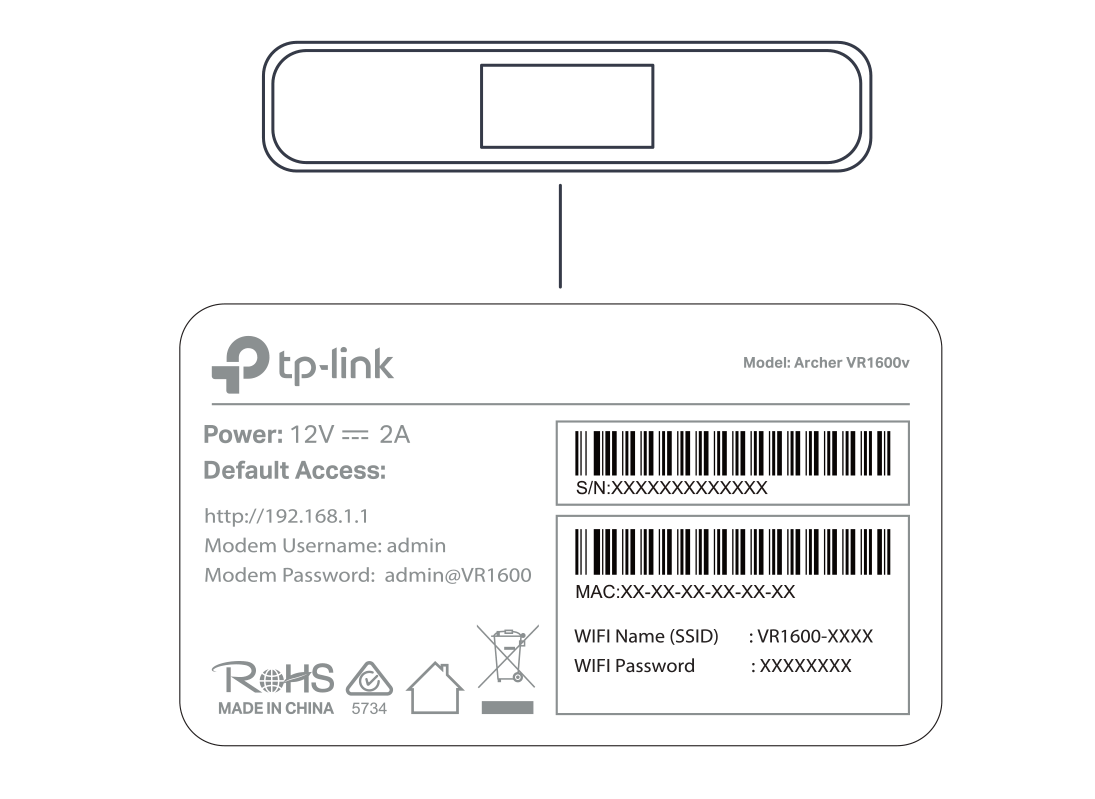
Find the Wi-Fi Name and Wi-Fi Password printed on the sticker on the back of the modem. To connect, choose the Wi-Fi Name on your device, then type in the Wi-Fi Password when prompted. The password is case sensitive.

Connect with a cable
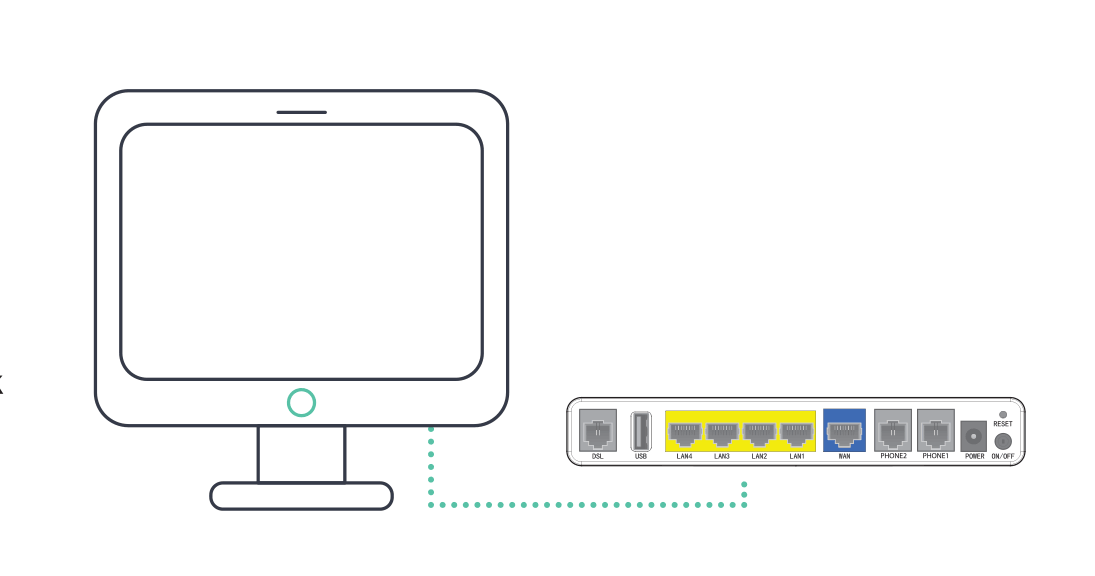
To connect a device, like a laptop or desktop computer, directly to a modem, plug one end of the supplied ethernet (yellow) cable into a yellow LAN port on the back of the modem and the other into your device.

4. Phone set-up
If you have selected an nbn® home phone, your phone will not work with the standard phone socket. Instead, it will now work via the internet - it's called VoIP (Voice over Internet Protocol). The good thing is you keep your phone number. You will receive an SMS from us letting you know when your phone service is active, just follow the easy steps below:
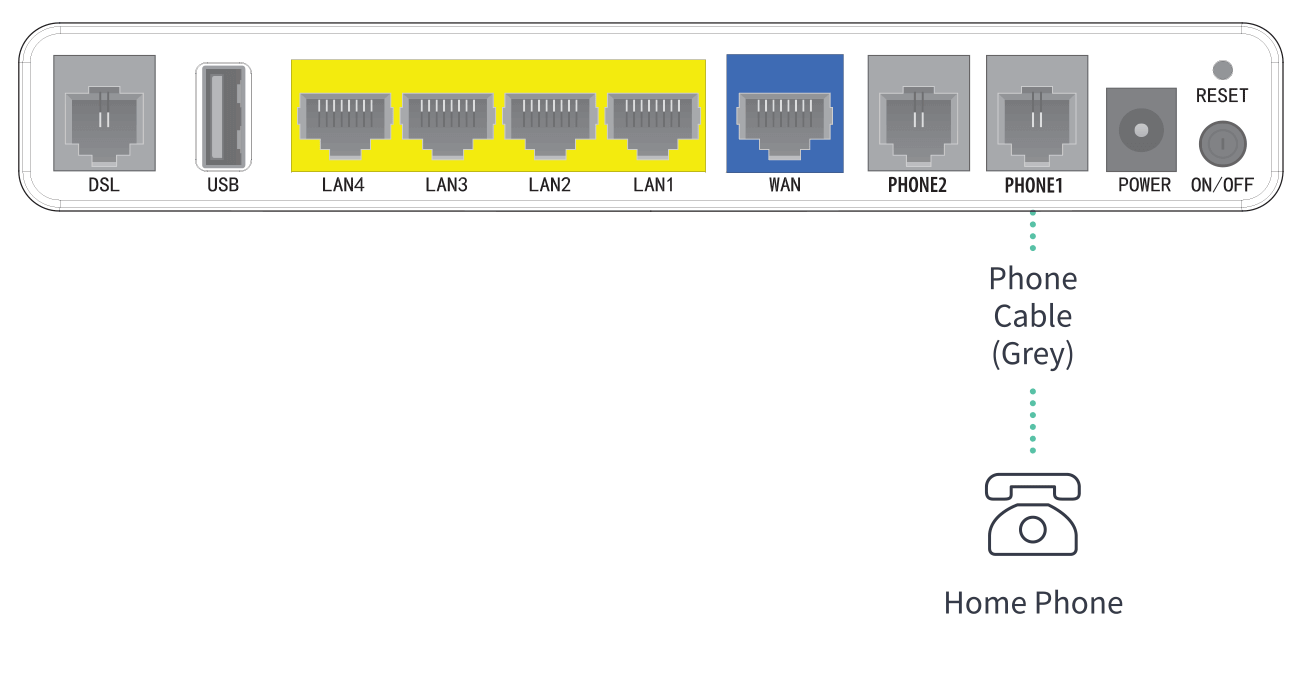
a. Connect the phone cable between phone1 port (grey) on modem and your home phone. Refer to below diagram.
b. Switch the modem off
c. Switch the modem back on. Once you see the green phone light ![]() on the front of your modem , you are ready to make a call.
on the front of your modem , you are ready to make a call.
